
Here's the trap every photographer hits on TikTok: you already know how to make a beautiful image, but the camera that makes your living is pointed at your subject - not at you. The content that actually grows photography accounts is behind-the-scenes footage of the shoot and the edit, and capturing it while you're busy working feels impossible.
It isn't. The photographers racking up millions of views aren't better at multitasking - they've just solved the "who films me while I shoot?" problem with one cheap piece of gear and a repeatable setup. Once you have it, every shoot quietly produces a week of content without slowing you down.
This guide walks through the entire filming process: the two-camera setup that lets you shoot and film at the same time, the kit that actually matters, how to screen-record your edits, framing for vertical, audio and lighting without a studio, and a film-day workflow you can run on autopilot. If you want the bigger-picture strategy first, start with our complete TikTok for photographers guide, then come back here for the setup.
The honest summary:
- A second device is the whole game. An old phone on a $20 flexible tripod solves the "I'm already holding a camera" problem instantly.
- Set it and forget it. Filming and shooting at once only works when the filming device runs passively in the background.
- Your edit is footage too. Screen-recording your Lightroom edit is the easiest viral clip most photographers never capture.
- Audio beats lighting. Behind-the-scenes is forgiving on visuals; bad sound is the one thing that kills a talking clip.
What's Inside
- 1. Why Filming - Not Photography - Is the Bottleneck
- 2. The Two-Camera Problem (and How to Solve It)
- 3. Your Filming Kit: What You Actually Need
- 4. How to Film a Shoot: The Step-by-Step Setup
- 5. Screen-Recording Your Edits (the footage you're skipping)
- 6. Filming for the Vertical Frame
- 7. Audio & Lighting Without a Studio
- 8. The Edit: Turning Footage Into a Clip
- 9. One Shoot, Five Clips: The Film-Day Plan
- 10. When to Amplify What You Filmed
- Frequently Asked Questions
1. Why Filming - Not Photography - Is the Bottleneck
Most photographers assume their growth problem is creative - that they need better photos, a nicer camera, or a more interesting niche. It almost never is. The bottleneck is that they have stunning images and no footage of how they were made. A finished photo is a single frame; TikTok rewards motion, process, and transformation.
Think about what actually travels on PhotoTok: the edit reveal, the behind-the-scenes of a shoot, the "ugly location, beautiful photo" pan, the gear close-up. Every one of those is video of you working - not the photo itself. The photo is the payoff at the end. The footage is the content.
That reframe changes everything about how you approach a shoot. You're no longer just a photographer who occasionally remembers to post. You're a photographer who treats every session as a filming opportunity that happens to also produce client work. The good news: once the setup is in place, capturing footage adds almost zero time to your shoot.
2. The Two-Camera Problem (and How to Solve It)
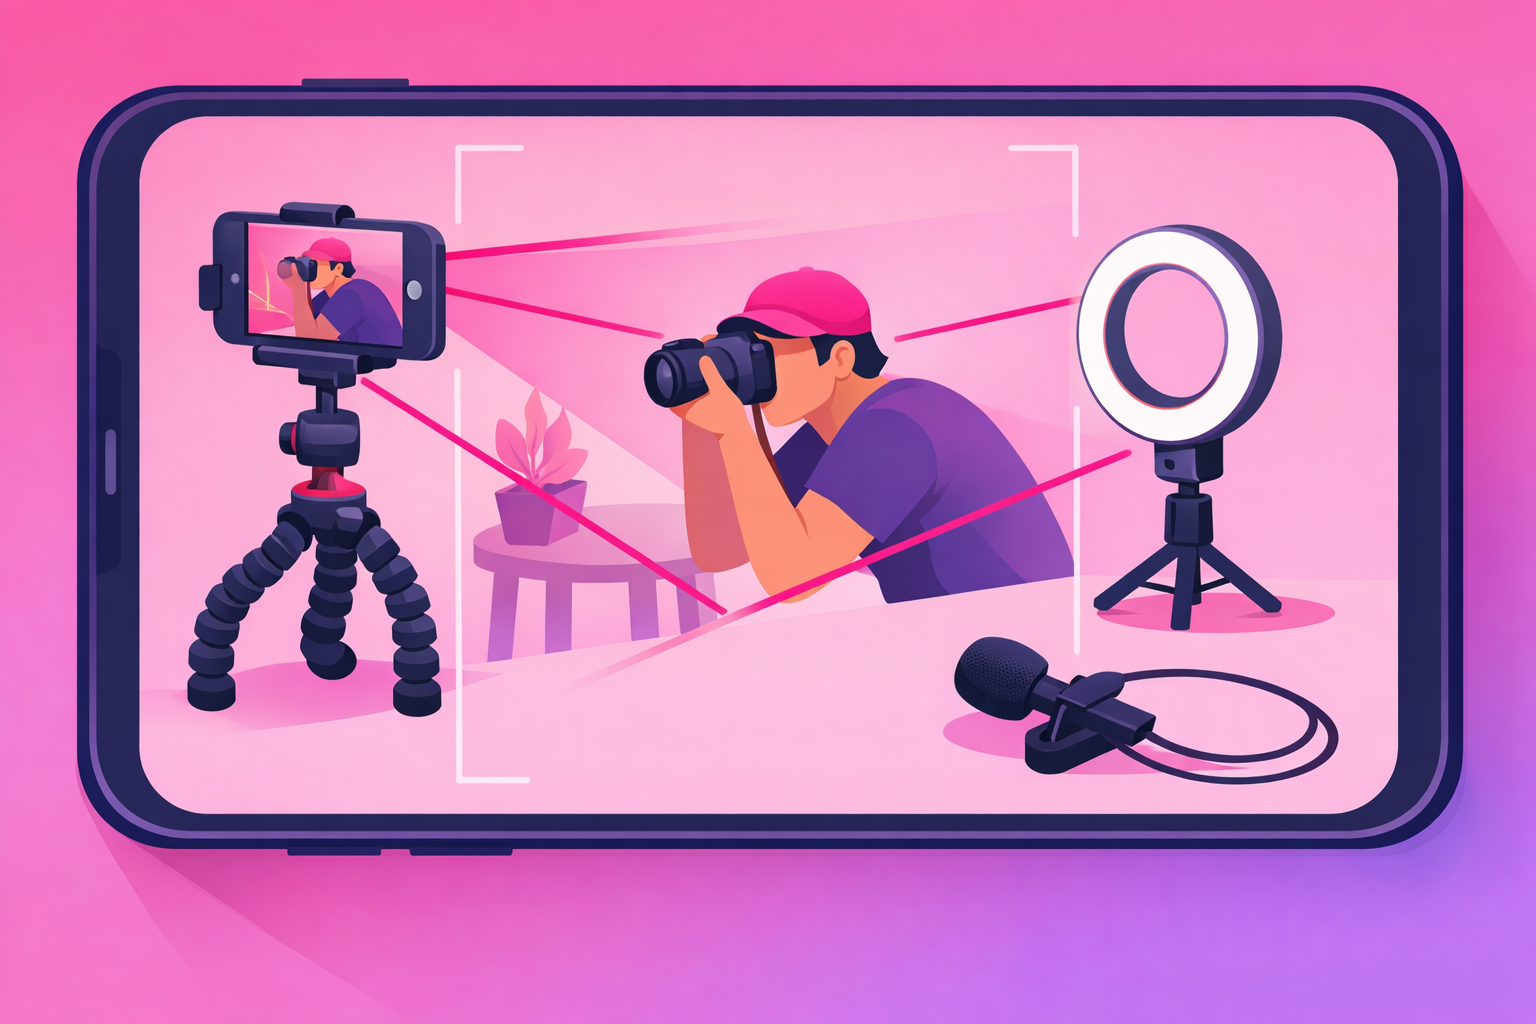
Here's the genuine obstacle that stops most photographers: you can't film yourself and shoot at the same time with one device. Your hands are full. Your eye is on the viewfinder. You're directing a subject. There is no spare attention for holding a phone.
The solution is to make the filming device completely passive. You set up a second camera - almost always just an old phone - before the shoot begins, hit record, and let it run untouched. It captures everything. Afterward, you keep the few good seconds and throw away the rest. You never "operate" two cameras at once, because the second one operates itself.
This single mental shift - film passively, shoot actively - is what separates photographers who post consistently from those who keep meaning to. You're not adding a job to your shoot. You're adding a tripod that does the job for you.
If you only ever take one thing from this guide, take this: buy a cheap second phone, clamp it on a flexible tripod, and press record before every shoot. That one habit produces more usable photography content than any camera upgrade ever will. For a vault of concepts to point that footage at, see our 50+ photography content ideas.
3. Your Filming Kit: What You Actually Need
You almost certainly already own the most important piece - a phone with a good camera. Everything else is cheap, and you can add it over time. Don't let "I need more gear" become the excuse that keeps you from filming. Here's the kit in priority order:
- A second phone (or any old smartphone). This is your dedicated filming device. It doesn't need a SIM or to be new - it just needs to record video and stay out of your way.
- A flexible tripod or clamp mount. A $15-25 bendable tripod that wraps around a light stand, a railing, or a chair is more useful than an expensive rigid one, because you can mount it anywhere on location.
- A clip-on lapel mic. A cheap wired or wireless lavalier transforms your talking clips. This is the single biggest quality jump for any video where you speak to camera.
- A small LED panel or ring light. Optional. Natural light covers most shoots, but a portable light helps for indoor edits, dark venues, and talking-head clips.
- A free vertical editing app. CapCut, your phone's native editor, or TikTok itself. You do not need desktop software to start.
Notice what's not on this list: a gimbal, a cinema camera, a lighting kit, a studio. Behind-the-scenes content is supposed to feel raw and real. Over-polished footage actually performs worse, because it reads like an ad instead of a peek behind the curtain. Start with a phone and a tripod, and upgrade only when you hit a real wall.
4. How to Film a Shoot: The Step-by-Step Setup
This is the core workflow - the repeatable setup you run on every shoot. It takes about two minutes to set up and adds almost nothing to your shooting time, because the filming device runs itself. Follow these steps in order:
- Mount the second phone before the shoot starts. Clamp it on the flexible tripod off to the side, framed vertically, wide enough that you and your subject both fit and you have room to move. Lock it down so it can't drift.
- Grab setup and location b-roll. Before anyone's in position, film 10 to 20 seconds of the location, your gear laid out, and you prepping. This unglamorous footage is the "before" that makes the final photo feel earned.
- Film yourself working from a few angles. Let the wide shot run during the shoot, then grab a close-up of your hands on the camera and an over-the-shoulder shot of the composition you're framing. Variety in the edit keeps watch-through high.
- Capture the through-the-lens moment. Film your camera's screen or viewfinder as you nail a frame, or shoot tethered so the image pops up on a laptop. Seeing the actual photo appear is deeply satisfying to viewers.
- Record the finished frames as the reveal. At the end, film the best straight-out-of-camera shots. You'll pair these with the edited versions later for a before-and-after.
- Stop, review, and keep only the gold. Most of the footage is filler. Scrub through, flag the three or four seconds where something interesting happens, and discard the rest. You film a lot to keep a little.
The discipline here is letting the camera run and trusting that the good moments will happen. Don't stop your actual shoot to "get the shot" for TikTok - that breaks your flow and the footage looks staged. Shoot like normal; let the second phone document it.
Pro Tip
Set the filming phone to record at 60fps if it can. The extra frames let you slow down a moment - a shutter press, a reflector flip, a subject's laugh - into a smooth, cinematic beat in the edit without it looking choppy. It costs you nothing at film time and gives you far more to work with later.
5. Screen-Recording Your Edits (the footage you're skipping)
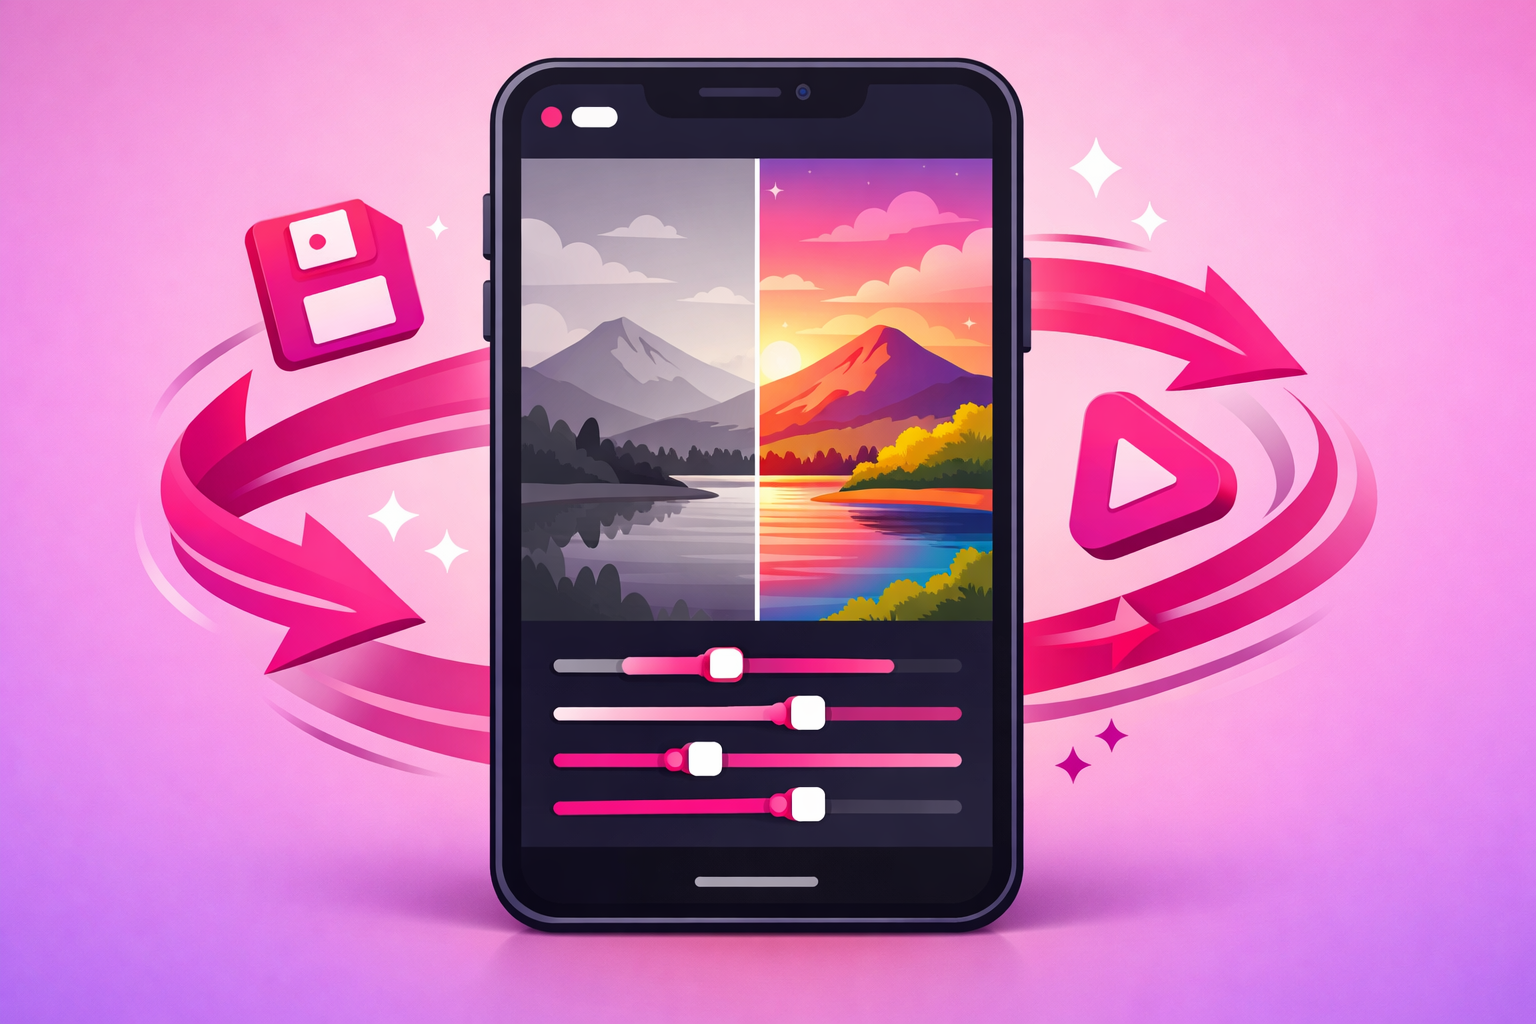
Here's the easiest viral clip most photographers never capture: the edit. The transition from a flat, dull raw file to a vibrant finished image is one of the most satisfying things on the platform - and you're already doing it every day. You just have to hit record before you open Lightroom.
- On desktop: use your operating system's built-in screen recorder (or a free tool) to capture Lightroom, Photoshop, or Capture One as you edit. Record the full edit; you'll compress it later.
- On mobile: turn on your phone's native screen recorder and edit in Lightroom Mobile or Snapseed. This is the lowest-friction option and looks completely native to TikTok.
- Speed-ramp the boring parts. A ten-minute edit becomes a 20-second clip when you speed up the slow stretches and slow down for the one or two big moves that transform the image.
- Always front-load the result. Open the clip on the finished photo, then cut back to the raw file. The viewer needs to see the destination before they'll watch the journey.
The reason edit clips work so well is that they earn saves - viewers bookmark them to try the technique on their own photos - and save rate is one of the strongest quality signals on the platform. For the full breakdown of which signals decide whether a clip travels, see our algorithm ranking factors guide.
6. Filming for the Vertical Frame
Photographers are trained to think in landscape and to compose carefully. TikTok demands the opposite: a tall 9:16 vertical frame, filled edge to edge, that reads clearly on a phone held at arm's length. Footage shot horizontally and cropped later wastes most of your resolution and almost always looks like an afterthought.
A few rules make your behind-the-scenes footage feel native instead of repurposed:
- Always film vertical. Set the second phone in portrait orientation from the start. If you might also want a horizontal version, film vertical and crop out - never the reverse.
- Fill the frame with motion or detail. A tight shot of your hands adjusting a lens reads better on a phone than a wide static shot of an empty studio. Get closer than feels natural.
- Keep the key action in the center third. TikTok's caption, buttons, and username overlays eat the edges. Anything important - your face, the photo, the gear - belongs in the middle.
- Vary your angles. A single locked-off wide shot gets boring fast. Cut between the wide, the close-up, and the over-the-shoulder to hold attention through the whole clip.
Your eye for composition is an advantage here, not a liability - you already understand light, framing, and balance. You're just applying it to a different aspect ratio and to footage instead of a single frame.
7. Audio & Lighting Without a Studio
Behind-the-scenes content is unusually forgiving on production value - the rough, on-location feel is part of why people trust it. But there are two failure modes worth avoiding, and they matter in a specific order.
Audio first. If you talk to camera or narrate your process, bad sound will sink an otherwise great clip. Most viewers watch talking videos with sound on, and wind, echo, or a far-away phone mic makes a clip feel amateur instantly. A $20 clip-on lapel mic fixes 90% of the problem. If you don't want to talk on location, record a clean voiceover later in a quiet room and lay it over the footage.
Lighting second. You already understand light better than almost any other creator on the platform - apply it. Shoot your behind-the-scenes near a window or in open shade for soft, flattering light. For indoor edits or dark venues, a small portable LED panel is enough. You're not lighting a film set; you're just making sure the footage isn't a muddy, underexposed mess.
The trap to avoid is over-investing in either one before you've posted anything. Film a month of clips with your phone's built-in mic and natural light, see what resonates, and then spend on the upgrade that fixes your actual weak spot.
8. The Edit: Turning Footage Into a Clip
You've got the footage - now it has to become a clip that stops the scroll. The edit is where amateur footage becomes a video people actually finish. The good news is that the structure is almost always the same, so it becomes fast and repeatable.
- Open with the payoff. Your first frame is the finished photo or the most satisfying moment. Within one second, the viewer should know what they're going to get if they stay.
- Cut to the "before." Drop into the unremarkable setup - the bland location, the flat raw file - so the gap between start and finish becomes the tension that holds attention.
- Show the process, fast. String your best behind-the-scenes and edit footage together, speed-ramped, set to a beat. Cut anything that drags. No single stage should overstay.
- Land on the reveal. End on the finished image, clean and full-frame. This is the moment that earns the save and the rewatch.
- Add captions and a hook line. Most viewers start muted; on-screen text carries the hook. A line like "watch this dull raw photo come alive" in the first frame lifts retention.
Keep your finished clips between 15 and 35 seconds to start. Tight, punchy, payoff-first videos train the algorithm that your account holds attention - and watch-through is the signal that decides whether a clip travels. For the broader system behind turning consistent posting into compounding growth, see our complete TikTok growth strategy guide.
9. One Shoot, Five Clips: The Film-Day Plan
The whole reason to nail your filming setup is leverage: a single shoot should feed your feed for a week. Here's how one outing becomes five distinct clips, each pulled from footage you captured without any extra trips.
- Clip 1 - The behind-the-scenes. Setup b-roll plus you working, cut to the final frame. The flagship "how it was made" video.
- Clip 2 - The edit reveal. Your screen-recorded edit, raw to finished, front-loaded with the result. Built for saves.
- Clip 3 - The settings or technique breakdown. A quick teach on the one choice that made the shot - the lighting trick, the lens, the posing cue.
- Clip 4 - The gear close-up. What you packed and why, filmed during setup. High save value and an easy affiliate tie-in.
- Clip 5 - The final result. The finished images on their own, with a story or caption about the shoot. Showcases the work and the win.
Five clips from one shoot, and you can stagger them across the week so your account never goes quiet. Decide which five before you head out - that intention is what turns "I'll film if I remember" into a content engine that runs every time you pick up a camera. For a running list of formats to fuel that engine, the photography content ideas vault pairs directly with this filming workflow.
10. When to Amplify What You Filmed
Once you're filming consistently, you'll start producing the occasional clip that clearly outperforms the rest - a behind-the-scenes or edit reveal that earns saves and shares well above your account average. That clip is a candidate for paid amplification. Promotion doesn't rescue a flat video; it pours fuel on signals the algorithm is already reading.
A photography clip is worth promoting when it clears your organic signal threshold:
- Save rate above 1.2% of views (edit reveals and tutorials run higher).
- Share rate above 1.0% of views.
- Completion rate above 55% on short clips or 35% on longer ones.
- A clear lift in profile visits and follows - or, if you sell presets or book clients, a spike in link clicks.
Behind-the-scenes and edit-reveal clips make the best promotion candidates because they earn the saves and shares that mean paid traffic preserves the organic signal keeping the clip alive after the campaign ends. That selective approach is exactly what our TikTok promotion service is built around - we amplify photography clips that have already proven themselves rather than spraying budget across every upload. For the mechanics of paid amplification, see our Spark Ads guide and the complete TikTok advertising guide.
Frequently Asked Questions
Do I need a second camera to film photography content for TikTok?
A second device makes it dramatically easier, but it doesn't have to be a real camera - an old phone on a cheap flexible tripod is the single best upgrade you can make. The whole challenge of photography content is that you're operating a camera while also needing to be on camera, so a dedicated filming device that just runs in the background solves it for under $30. If you only have one phone, film setup and b-roll before the shoot, then screen-record your edit afterward - you can build a full clip without ever filming yourself live.
How do I film myself while I'm also operating the camera?
Set the filming phone up before you start shooting and let it run - don't try to manage both at once in the moment. Clamp the second phone on a flexible tripod, frame it wide enough that you can move around inside the shot, hit record, and forget it exists until the session is over. You'll throw away most of the footage and keep the few seconds where the action is good. Filming and shooting at the same time only works when the filming device is fully passive and set up in advance.
What should I film during a photo shoot for TikTok?
Film five things every shoot: the location and gear setup before you start, a wide shot of you directing and shooting, a close-up of your hands and the camera, the over-the-shoulder view of what you see through the lens, and the finished frames as a reveal. Those five clips become a behind-the-scenes video, an edit reveal, a settings breakdown, a gear close-up, and a final-result post - five pieces of content from one outing. The footage most photographers forget is the boring setup, but that context is exactly what makes the transformation satisfying.
How long should a photography TikTok video be?
Most high-performing photography clips run 15 to 35 seconds. The behind-the-scenes hook or edit reveal should land in the first second or two, then the process fills the rest. Detailed edit walk-throughs and tutorials can stretch toward 60 seconds when the payoff is strong, but only if you front-load the finished photo so viewers know what they're waiting for. Speed-ramp the slow parts of an edit and cut anything that doesn't earn its place.
Do I need good audio and lighting to film behind-the-scenes content?
Less than you think. Behind-the-scenes photography content is forgiving because the rough, real feel is part of the appeal - viewers expect a handheld, on-location look. A cheap clip-on lapel mic is the highest-value audio upgrade if you talk to camera, and natural daylight covers most situations. The one thing to avoid is unusable audio with wind and echo, since most TikTok viewers watch talking clips with sound on. If you only fix one thing, fix the audio, not the lighting.
Filmed something that's taking off? Amplify it.
Once your filming setup is producing behind-the-scenes and edit-reveal clips on a regular basis, the next move is to put budget behind the ones that break out. Viryze is built for exactly that - we only promote clips that have already cleared the organic signal threshold, so your spend compounds your best work instead of rescuing your weakest. Whether you're building an audience, selling a preset pack, or filling your booking calendar, selective amplification is the difference between burning budget and buying real growth.
See how selective amplification worksRelated Reading
- TikTok for Photographers: The Complete 2026 Guide - the full playbook for growing and monetizing a photography audience.
- Photography TikTok Content Ideas: 50+ Video Concepts - the formats to point your new filming setup at.
- The Complete TikTok Algorithm Guide - the ranking signals that decide which photography clips travel.
- The Complete TikTok Growth Strategy Guide - turning consistent posting into compounding growth.
- TikTok Spark Ads Guide - the format every photographer should default to for amplification.

Head of Creator Success at Viryze
TikTok growth strategist helping creators reach their first 100K followers through data-driven promotion strategies.