You spend three hours on a painting you're genuinely proud of, you film it, you post it… and it dies at 300 views. Meanwhile a creator with worse art and a shakier phone racks up two million views on a piece that took them twenty minutes. If that's ever happened to you, the problem almost certainly isn't your art. It's how you filmed it.
Here's the deal: on TikTok, your art is the product, but the process video is the package. A wobbly, badly lit clip of a beautiful piece will lose every time to a clean, well-shot clip of a decent one. The good news? Filming art is one of the most learnable skills on the platform, because the camera never moves and the "set" is your desk.
This guide is the complete playbook for how to film art process videos for TikTok with gear you can buy for the price of a couple of canvases. We cover the only piece of equipment that truly matters, how to light flat art so the colors pop, the reveal-first hook that stops thumbs, the exact time-lapse settings to use, and a repeatable film-day workflow. If you're still deciding what to make, pair this with our vault of 50+ art content ideas and the complete guide to TikTok for artists.
The three rules of art filming:
- Lock the camera overhead. A steady, top-down shot is the single biggest upgrade you can make, and it costs almost nothing.
- Soft, even light wins. Flat art needs flat light. One big soft source beats any camera upgrade.
- Show the payoff first. Lead with the finished piece, then rewind to the blank surface.
What's Inside
- 1. Why Most Art Videos Get Ignored
- 2. The Only Gear That Actually Matters
- 3. Setting Up the Overhead Lock
- 4. Lighting Art So the Colors Pop
- 5. The Reveal Tension Loop & Signature Shots
- 6. Time-Lapse Settings That Stay Satisfying
- 7. Recording Clean Process Audio
- 8. The 60-Minute Film-Day Workflow
- 9. Editing for the First Frame
- Frequently Asked Questions
1. Why Most Art Videos Get Ignored
When an art clip flops, the artist's instinct is to blame the art — "maybe my style isn't trendy." That's almost never it. The real culprits are three filming mistakes that show up again and again: a shaky or angled camera, dull flat lighting, and a slow opening.
A wobbly or tilted shot is the first tell. Process content lives or dies on how "satisfying" it feels, and nothing breaks that feeling faster than a camera that drifts, refocuses, or films your art from an awkward three-quarter angle. The most rewatchable art on TikTok is shot locked and straight down, so every brushstroke lands in the exact same frame.
Bad lighting is the silent killer. Art shot under a single ceiling bulb looks muddy, the colors go flat, and a glossy painting or screen throws glare straight into the lens. The same piece under soft, even light looks like it belongs in a gallery. Because flat artwork reflects whatever is above it, controlling the light is most of the battle.
The third killer is a slow start. A clip that opens on a blank canvas asks the viewer to wait for a payoff they can't see yet — and on TikTok, waiting means swiping. TikTok's ranking leans heavily on watch-through rate, so a slow open tanks your reach in the first second. We'll fix all three, starting with the cheapest, highest-impact change of all.
2. The Only Gear That Actually Matters
You can spend a fortune on cameras and studio lighting. You don't need to. For art process videos, three upgrades do almost all the work, and together they cost less than a single mid-size canvas.
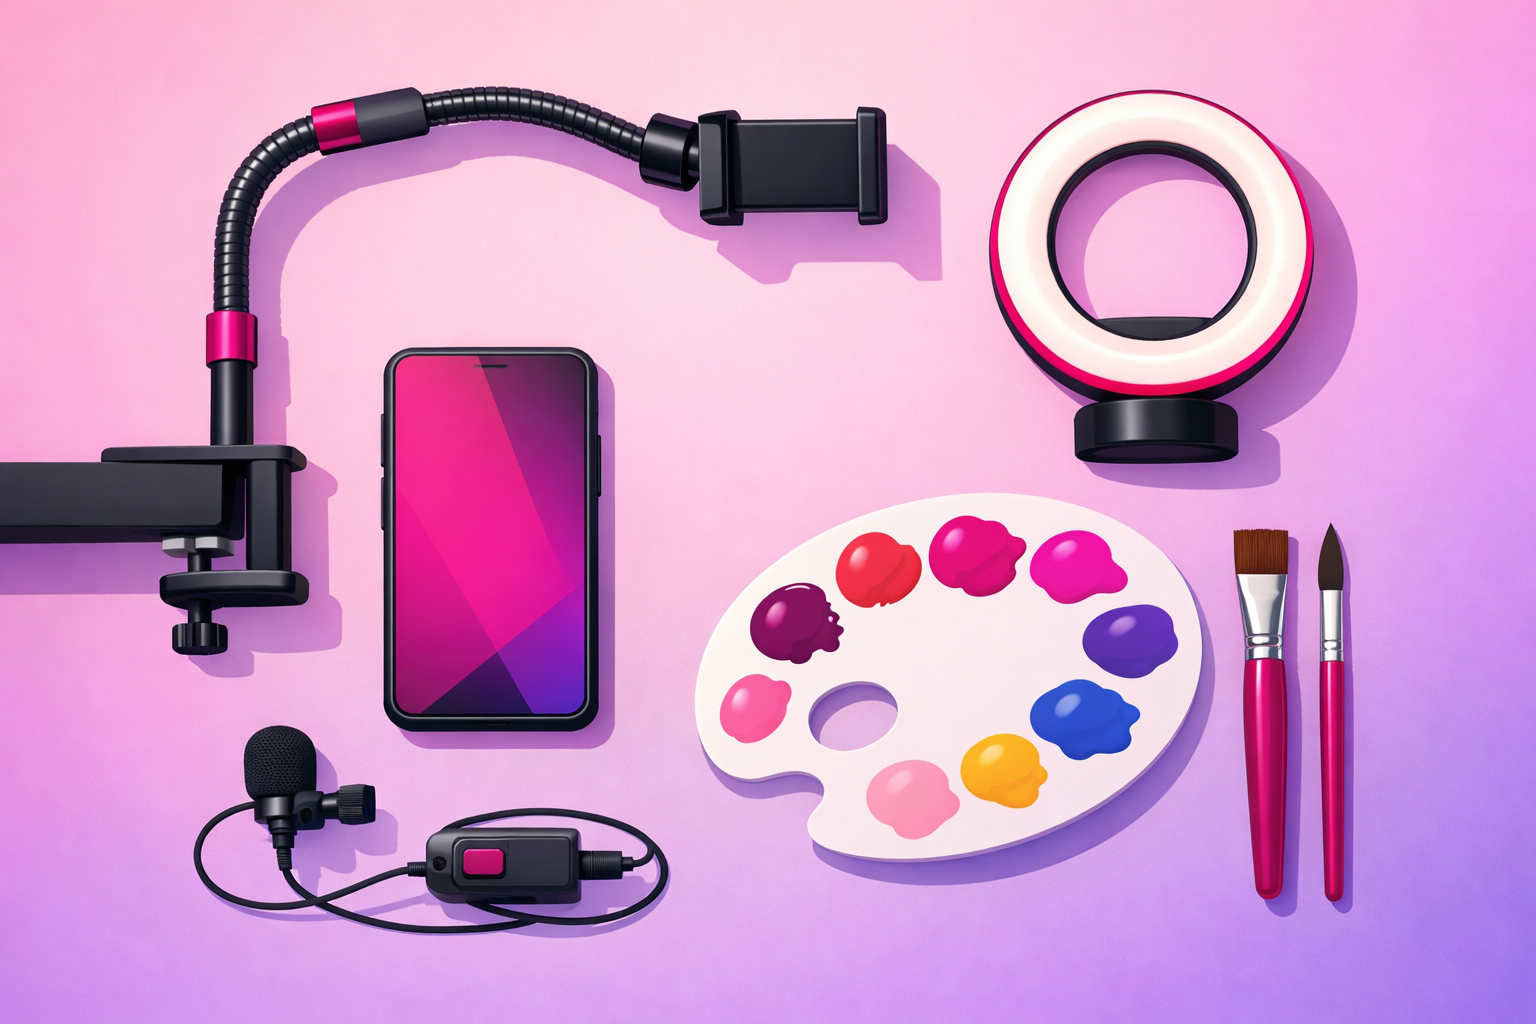
An overhead phone mount (the non-negotiable)
This is the most important purchase you'll make as an art creator, full stop. A flexible arm clamp or an overhead tripod holds your phone perfectly still, pointing straight down at your work. A good one runs $20 to $40 and instantly separates your content from the hand-held, drifting clips that fill most artists' feeds. If you buy one thing, buy this.
A soft light source
Your art needs flat, even light with no harsh shadows or glare. A large window with indirect daylight is free and excellent. If you film at night or want consistency, a $25 to $50 LED panel or a ring light with a diffuser does the job. The key word is soft — bigger, diffused light wraps around your hand instead of throwing a hard shadow across the page.
A clip-on microphone
The real sounds of art — a brush dragging across paper, a pencil scratching, a pottery wheel humming — are an underrated hook. A $30 to $60 clip-on or lavalier mic captures those crisp, ASMR-style sounds and gives you clean narration when you want to talk. Phone mics pick up room echo; a dedicated mic makes your process sound as good as it looks.
Optional, not essential
A second fill light, a color-checker card for accurate tones, and a small bounce board are nice-to-haves once you're consistent. But don't let "I need more gear" become the reason you're not posting. An overhead mount, soft light, and a mic are enough to film professional-looking process content this week.
3. Setting Up the Overhead Lock
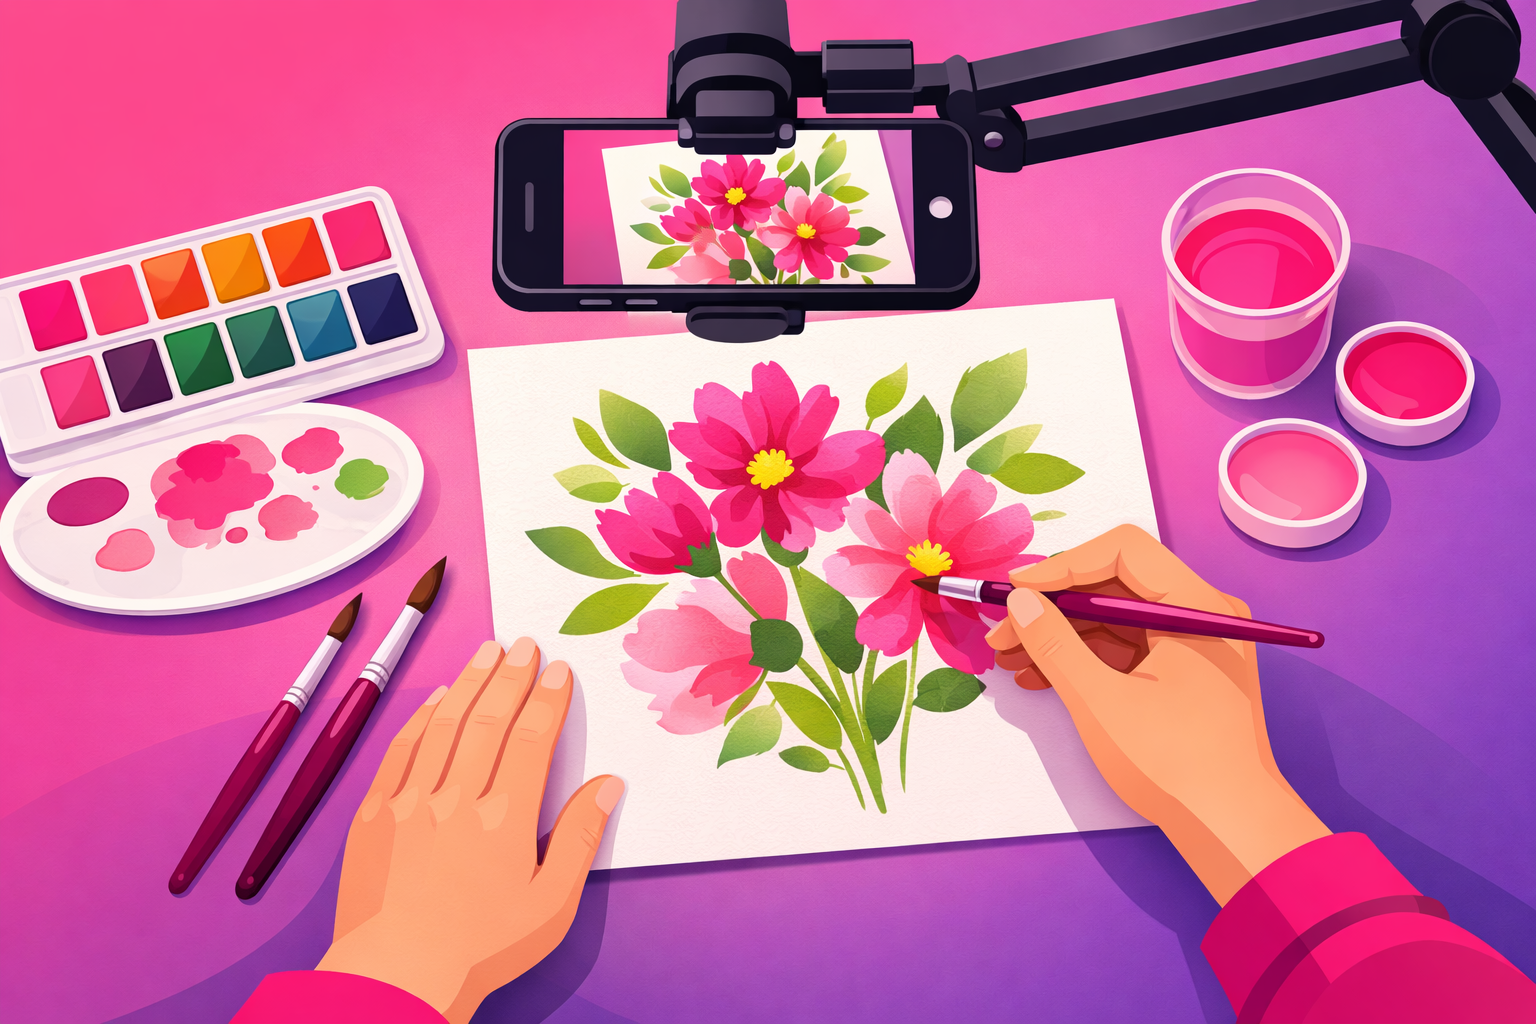
The top-down, locked-off shot — what we call the Overhead Lock — is the foundation of nearly every viral art video. Get this dialed in once and you can reuse the exact same setup for every piece you make.
Mount the phone perfectly parallel to your surface. The lens should point straight down, not at an angle. A tilted overhead shot looks subtly "off" and creates keystone distortion that makes your art look warped. Most overhead arms let you level the phone — use your phone's built-in level or grid lines to get it square.
Frame tight, with a little breathing room. Fill the vertical frame with your artwork so the detail is visible on a small screen, but leave a margin so your hand and tools can enter and exit naturally. Remember TikTok is vertical (9:16) — compose for a tall frame, not a wide one.
Lock your focus and exposure. Before you start, tap and hold on your artwork to lock auto-focus and auto-exposure (AE/AF Lock on most phones). This stops the camera from hunting or changing brightness every time your hand passes through. A locked exposure is what makes process footage feel smooth and intentional.
Pro Tip
Mark your surface and your mount with a small piece of tape so you can rebuild the exact same frame next time. A repeatable setup means your whole feed shares a consistent, professional look — and consistency is one of the trust signals that turns a casual viewer into a follower. To understand exactly why a steady, satisfying opening drives reach, see our complete TikTok algorithm guide.
4. Lighting Art So the Colors Pop
If the Overhead Lock is the skeleton, lighting is the skin. Flat artwork needs flat, even light, and the artists whose colors look richest aren't using more expensive paint — they're lighting their work properly.
Use one big, soft source from the side. Place your light to the left or right of your surface and slightly behind the phone, angled down across the art. A large diffused source — a north-facing window, a softbox, a ring light with a diffuser — spreads light evenly and keeps your hand from casting a hard shadow over your work.
Kill the glare. Glossy paint, varnish, resin, and screens act like mirrors. If you see a bright hotspot in your footage, move the light higher and more to the side until the reflection slides off the frame. For digital artists filming a tablet or monitor, lower your screen brightness slightly and angle the light so it never bounces straight into the lens.
Match your white balance to reality. Color accuracy matters more in art than almost any other niche — a follower who buys a print expects it to match the video. Shoot under one consistent light temperature (don't mix daylight and warm bulbs), and if your phone lets you set a manual white balance, lock it so the colors stay true from clip to clip.
5. The Reveal Tension Loop & Signature Shots
You don't need a hundred different shots. You need a reliable hook and a handful of repeatable moves. The hook is the part most artists get backwards, so let's fix it first.
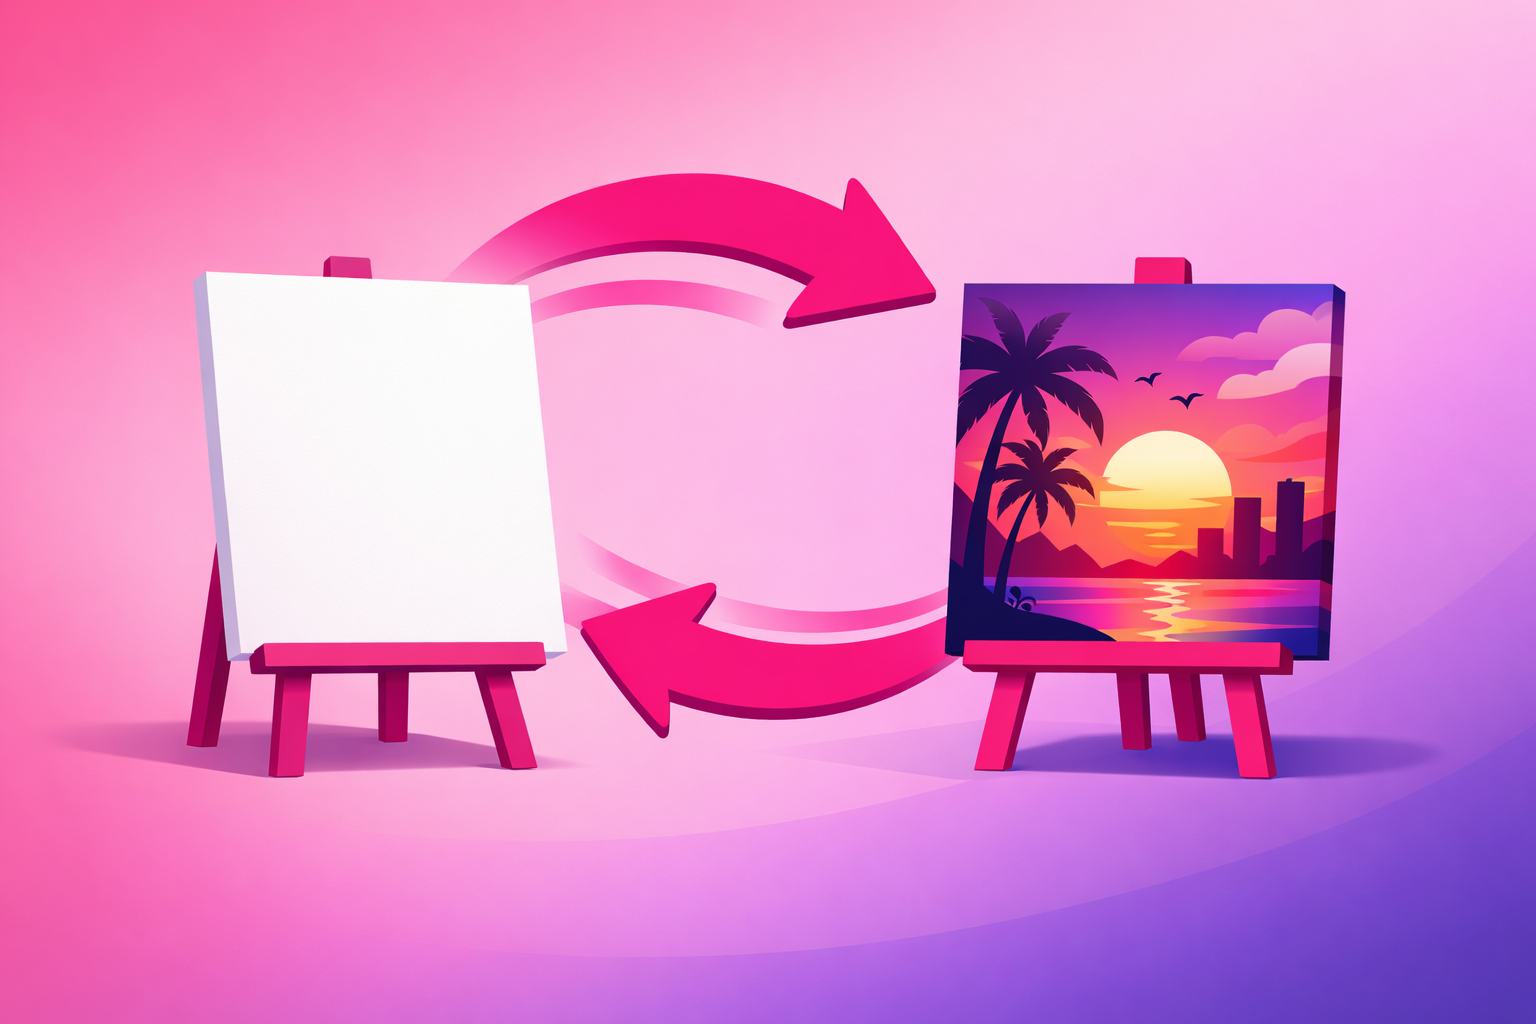
The Reveal Tension Loop (your hook)
Most artists open on a blank canvas because that's where the story starts. But a blank canvas asks the viewer to wait for a reward they can't see — and they swipe. Instead, open on the finished piece, then cut or rewind back to the blank surface and play the process forward. Showing the payoff first plants a question — "how did they make that?" — and the only way to answer it is to keep watching. That's the Reveal Tension Loop, and it's the single highest-impact change you can make to your edits.
The Satisfying Stroke
Slow down and film one perfect moment in real time — a single confident brushstroke, a clean ink line, a blend that melts two colors together, a strip of masking tape peeling to reveal a crisp edge. Drop one or two of these real-time beats into your sped-up time-lapse to give the eye somewhere to rest. These moments are the most saved and rewatched parts of any art clip.
The Detail Push-In
Once the piece is done, get a close, locked shot of the texture — the tooth of the paper, the layering of the paint, the sheen of the glaze. You can crop in during editing from your overhead footage, or move the phone closer for a dedicated take. These detail beats prove the craft is real and reward viewers who made it to the end.
The Hands-In Frame
Keep your hands moving naturally in and out of the shot. Art process content is more engaging when viewers can see the human making it — the grip on the brush, the wipe of a rag, the steady pressure of a carving tool. You don't need your face; your hands tell the whole story.
6. Time-Lapse Settings That Stay Satisfying
A three-hour painting is boring to watch in real time and impossible to fit on TikTok. The time-lapse is what turns hours of work into a 25-second clip that people watch twice. Here is how to get it right.
- Pick your method. Your phone's built-in time-lapse mode is the easiest path — it captures and compresses automatically. The more flexible method is to record the whole session at normal speed and speed it up 4x to 10x in the edit, which lets you slow back down for your satisfying strokes.
- Keep the phone plugged in. Recording for hours drains a battery fast. Plug into power and clear your storage before a long session so the camera never cuts out mid-piece.
- Don't bump the rig. The whole point of the Overhead Lock is that every frame matches. Work calmly, keep your elbows clear of the mount, and resist the urge to reposition the phone partway through.
- Vary the speed in the edit. A clip that runs at one constant fast speed feels robotic. Speed-ramp the dull stretches (sketching, drying, filling large areas) and drop to real time for the moments that deserve attention. That rhythm is what makes it feel satisfying instead of rushed.
One more thing: film more than you think you need. It's always better to have the full process captured and trim it down than to discover you missed the one stroke that would have made the perfect hook.
7. Recording Clean Process Audio
Visuals get the credit, but audio is what makes art content feel premium — and most artists ignore it completely. The real sounds of your craft can be the hook. Here's how to capture them.
- Record the process sounds up close. The scratch of a pencil, the drag of a loaded brush, the squelch of clay on a wheel — these ASMR-style sounds are deeply satisfying. Place your clip-on mic near the work and capture them clean, then decide later whether to feature them or lay a trending sound over the top.
- Record voiceover separately, in a quiet room. If you're narrating a technique or telling the story behind a piece, record the narration after you film, in a quiet space without the rig running. Clear narration keeps people watching, and watch-time is the signal that travels.
- Mind trending sounds. A trending audio can boost reach, but it competes with your process sounds. Either commit to the trend or commit to the ASMR — layering both muddy and loud rarely works.
- Avoid noisy environments. A humming fan, a TV in the next room, or street noise sneaks into every take. Record in the calmest space and time you can; early morning is usually the quietest.
8. The 60-Minute Film-Day Workflow
Talent isn't what makes creators consistent — a repeatable process is. Here's the exact order to run a shoot so you never lose a piece to a dead battery or a missed reveal. Call it the Payoff-First Film Day: you protect your hero shot before anything can go wrong. (The setup time shrinks fast once your rig lives on your desk.)
- Build the Overhead Lock (10 min). Mount the phone square and level, frame your surface in vertical, and lock focus and exposure on the work area.
- Set your light (5 min). Position one soft source to the side, check for glare and hand-shadows, and confirm the colors look true on screen.
- Plan the reveal (5 min). Decide what the finished piece will be and how you'll open the clip, so you film with the hook in mind from the first stroke.
- Record the process (25 min of filming, however long the art takes). Start the time-lapse, work calmly inside the frame, and drop to real time for your satisfying strokes. Keep the phone plugged in.
- Capture the finished reveal and details (5 min). Once the piece is done and clean, film your best static shot of it plus a couple of close-up detail pushes — this is the footage your edit will open on.
- Grab audio and log the idea (5 min). Record any voiceover in a quiet spot, note the hook and caption you'll use, and back up the footage so it doesn't sit unused on your phone.
Run this sequence every time and film days stop being chaotic. You'll walk away with a guaranteed reveal and enough coverage to cut a clean clip — exactly the kind of consistency the algorithm rewards. For the bigger picture on building momentum post by post, our complete TikTok growth strategy guide shows how consistent posting compounds over 90 days.
9. Editing for the First Frame
Filming well is half the job. The edit is where a good clip becomes a great one — and it all comes down to the first frame.
- Open on the payoff. Your finished piece or most satisfying moment goes first. Never make the viewer wait for the good part — show it, then rewind into the process.
- Cut to the beat. Sync your time-lapse and stroke beats to the rhythm of your audio. Beat-matched cuts feel intentional and satisfying, and they hold attention.
- Keep it 20 to 35 seconds. Speed up anything that drags and cut anything that doesn't earn its place. A tight 25-second clip beats a meandering 60-second one almost every time.
- Add captions. A large share of viewers watch with the sound off. On-screen text — the medium, the time it took, the question you want comments on — makes your clip work either way.
- End with a reason to engage. "Which color should I use next?" or "Part two coming" turns viewers into commenters and followers, and comments are rocket fuel for reach.
Once your filming and editing dial in, you'll start producing the occasional breakout — a process clip that clears your account's average save and completion rate. That clip is your signal. Instead of boosting every upload, the smart move is to put a focused budget behind the one that's already proving itself. That's exactly the model our TikTok promotion service is built around — selective amplification of clips with real organic momentum, which for artists turns directly into print, commission, and product sales.
Frequently Asked Questions
Do I need an expensive camera to film art videos for TikTok?
No. A modern smartphone shoots more than enough quality for TikTok, and the platform actually favors content that feels native to the phone. The single most important upgrade is an overhead phone mount so the camera stays locked and steady above your work. After that, good soft light and clean audio matter far more than any camera body. Spend on a stable overhead rig and lighting before you ever think about a dedicated camera.
How do I film an overhead art video without my own shadow getting in the way?
Position your light source to the side and slightly behind the phone, not directly in front of you, so your hand and body don't cast a shadow across the artwork. A single large, soft source — like a window or a diffused panel — wraps around your hand instead of throwing a hard shadow. If you still see shadows, raise the light higher and bounce a little fill light from the opposite side using a sheet of white paper or foam board.
Should art videos be sped up or filmed in real time?
Most art process videos perform best as a time-lapse. A painting that takes three hours becomes a satisfying 25-second clip when sped up, which keeps the watch-through rate high. Use your phone time-lapse mode, or film at normal speed and speed it up 4x to 10x in the edit. Real-time clips work for short techniques, a single satisfying stroke, or a tutorial where viewers need to follow along, but the full-piece reveal almost always wins as a time-lapse.
What is the best hook for an art process video?
Lead with the finished piece, then rewind to the blank surface. We call this the Reveal Tension Loop: showing the payoff in the first second creates a question in the viewer's mind — "how did they make that?" — and the only way to answer it is to keep watching. Opening on a blank canvas asks the viewer to wait for a reward they can't yet see, which tanks your first-second retention. Show the destination first, then take them on the journey.
How long should an art video be on TikTok?
Most high-performing art clips run 20 to 35 seconds. The finished reveal or the most satisfying moment should land in the first second or two, and the time-lapse should move quickly enough that no single stage drags. Longer tutorials can stretch toward 60 seconds when each step earns its place, but the full-piece reveal hits hardest when it is tight. When in doubt, speed it up and cut it shorter.
Filmed a process clip that looks incredible? Make sure people see it.
Clean overhead filming gets you clips worth watching — and consistency produces the occasional breakout. When one of your art videos clears your account's average save and completion rate, that's the moment to amplify it. Viryze only promotes clips that have already earned their reach organically, so your budget compounds your best work instead of rescuing your weakest. For artists, that paid reach turns straight into print sales, commissions, and new collectors.
See how selective amplification worksRelated Reading
- TikTok for Artists: The Complete 2026 Guide — the pillar guide covering lanes, hooks, production, growth, and monetization.
- Art TikTok Content Ideas: 50+ Video Concepts — the idea vault to pair with your new filming skills.
- The Complete TikTok Algorithm Guide — why the first frame and watch-time decide which clips travel.
- The Complete TikTok Growth Strategy Guide — turning consistent clips into a growing account over 90 days.
- The Complete TikTok E-commerce Guide — turning views of your art into print and product sales.

Head of Creator Success at Viryze
TikTok growth strategist helping creators reach their first 100K followers through data-driven promotion strategies.