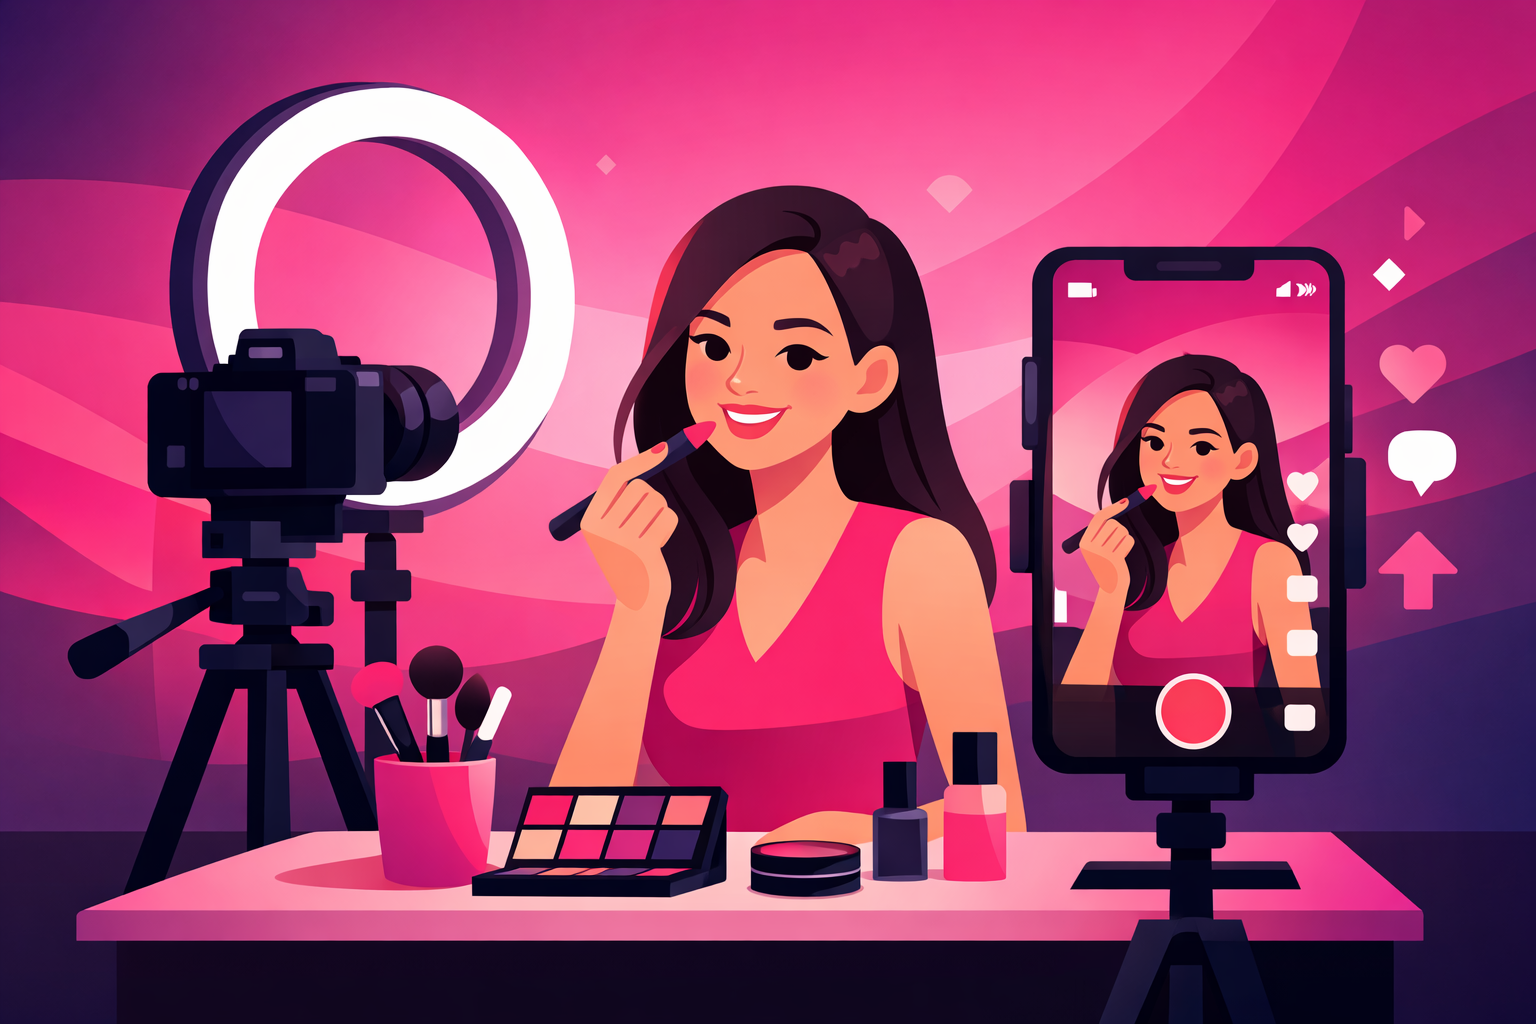
Makeup tutorials are the bread and butter of Beauty TikTok. With over 80 billion views on #MakeupTutorial alone, the demand for quality beauty content has never been higher. But here's the thing—the creators who blow up aren't necessarily the most talented makeup artists. They're the ones who know how to film.
The difference between a tutorial that gets 500 views and one that gets 500,000 often comes down to production quality. Lighting that makes colors pop. Camera angles that show every detail. Audio that's crisp and clear. These are the elements that keep viewers watching long enough for TikTok's algorithm to push your content to a wider audience.
In this step-by-step guide, we'll walk you through everything you need to film professional-quality makeup tutorials for TikTok—from setting up your space and choosing the right equipment, to mastering camera angles, lighting, and editing techniques that make your content stand out.
Table of Contents
- Essential Equipment (Without Breaking the Bank)
- Setting Up Your Filming Space
- Lighting That Makes Makeup Pop
- Camera Angles Every Beauty Creator Needs
- Audio Tips for Voiceovers and ASMR
- The Filming Process: Step by Step
- Editing Your Makeup Tutorial
- Common Filming Mistakes to Avoid
- Growing Your Beauty TikTok After Filming
- FAQ
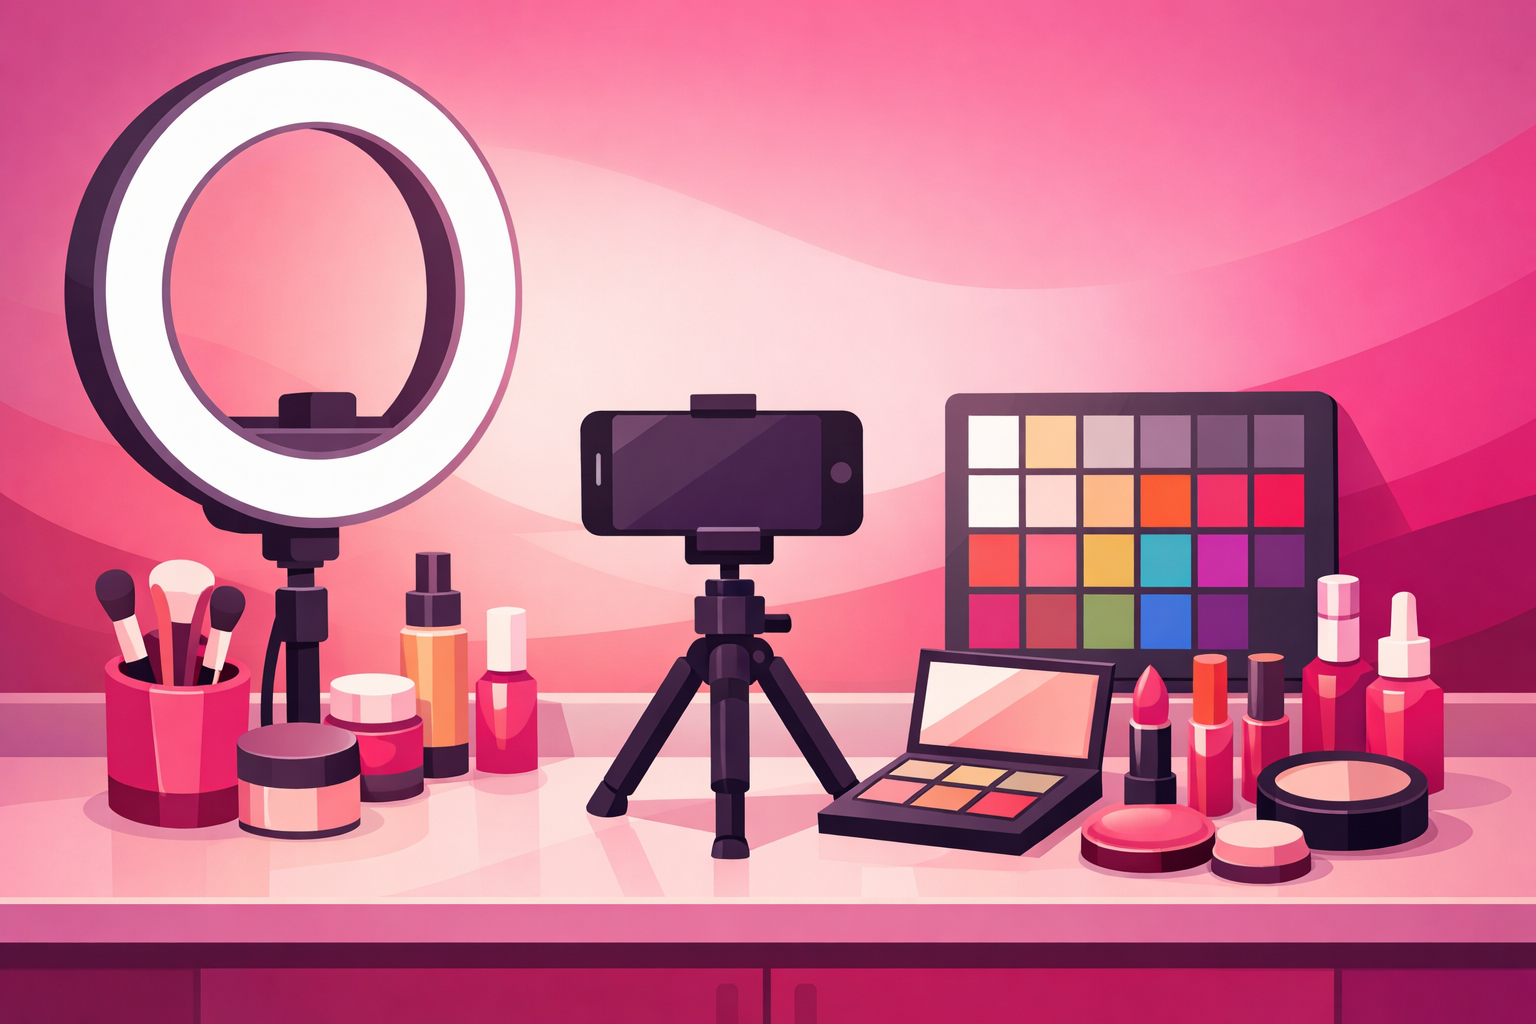
Essential Equipment (Without Breaking the Bank)
You don't need a professional studio to film stunning makeup tutorials. Most viral beauty TikToks are filmed with a smartphone and a few affordable accessories. Here's what actually matters.
Must-Have Equipment
- Smartphone with a quality camera—iPhone 12 or newer, Samsung Galaxy S21+, or Google Pixel 6+. These all shoot 4K video with excellent color accuracy for makeup.
- Ring light (18-inch recommended)—The single most important purchase. An 18-inch ring light ($25-$50) provides even, shadow-free illumination that shows true colors. Smaller 10-inch rings work for close-ups only.
- Phone tripod with flexible arm—A $15-$25 tripod with a gooseneck or adjustable arm lets you switch between eye-level and overhead angles without holding your phone.
- Clean mirror (optional but recommended)—A mirror behind your camera lets you see yourself while filming, keeping you centered in frame without checking your phone constantly.
Nice-to-Have Upgrades
- Clip-on macro lens ($10-$20)—Attaches to your phone for extreme close-ups of eyeshadow blending, lip liner, and lash application
- Wireless lavalier microphone ($25-$40)— Dramatically improves voiceover quality compared to phone's built-in mic
- Secondary light source ($20-$30)—A small LED panel placed at 45 degrees fills shadows the ring light misses
- Bluetooth remote shutter ($5-$10)—Start and stop recording without touching your phone
Total Starter Budget: $60-$100
Ring light ($30) + phone tripod ($20) + Bluetooth remote ($8) = under $60 for a professional-looking setup. This is the same basic kit that beauty creators with millions of followers started with. Don't let equipment anxiety stop you from starting.
Setting Up Your Filming Space
Your filming space doesn't need to be a dedicated studio. A corner of your bedroom, bathroom vanity, or even a desk near a window works perfectly. What matters is consistency and cleanliness.
Background Selection
The best backgrounds for makeup tutorials are clean and uncluttered. You want viewers focused on your face and the products, not distracted by what's behind you.
- •Solid white or neutral wall—The simplest and most versatile option. Works with any makeup look or style.
- •Styled vanity or shelf—Neatly arranged products create an aspirational aesthetic. Keep it curated—5-8 products max.
- •Portable backdrop—A $15 fabric backdrop in white or blush pink gives a studio look anywhere.
Product Organization
Before you hit record, lay out every product you'll use in the order you'll apply them. This serves two purposes: it keeps your tutorial smooth without fumbling for products, and it creates a visually satisfying "product lineup" shot that viewers love to screenshot and save.
Pre-Filming Checklist
- ✓Products laid out in application order
- ✓Background clean and uncluttered
- ✓Ring light positioned and color temperature set
- ✓Phone charged (filming eats battery) and on Do Not Disturb
- ✓Camera lens cleaned (fingerprints kill video quality)
- ✓Test clip recorded and reviewed for framing and lighting
Lighting That Makes Makeup Pop
Lighting is the single biggest factor that separates amateur-looking tutorials from professional ones. Bad lighting washes out colors, creates unflattering shadows, and makes it impossible for viewers to see the detail in your work.
Ring Light Positioning
Position your ring light directly in front of your face at eye level, about 1.5 to 2 feet away. Your phone or camera should sit in the center of the ring (most ring lights have a phone mount for this). This creates the signature even, shadow-free look that makeup content requires.
Color Temperature Matters
This is the detail most beginners miss. Set your ring light to 5000-5500K (daylight) for the most accurate color representation. Warm light (3000K) makes everything look orange-toned—viewers won't see your true eyeshadow colors. Cool light (6500K+) makes skin look washed out and unnatural.
The Two-Light Setup (Level Up)
Once you're comfortable with your ring light, adding a second light source eliminates the remaining subtle shadows and creates a studio-quality look. Place a small LED panel at a 45-degree angle from the opposite side of your ring light. Set it to the same color temperature but at about 50% brightness to serve as fill light.
Natural Light Pro Tip
If you film during the day, a window can replace your ring light entirely. Sit facing the window with your phone between you and the window. Overcast days provide the most even, flattering natural light. Direct sunlight creates harsh shadows—use a sheer white curtain to diffuse it.
Camera Angles Every Beauty Creator Needs
Using multiple camera angles is what separates viral makeup tutorials from flat, boring ones. Angle changes keep viewers engaged, show different perspectives of your work, and increase watch time—which is the most important metric for TikTok's algorithm.
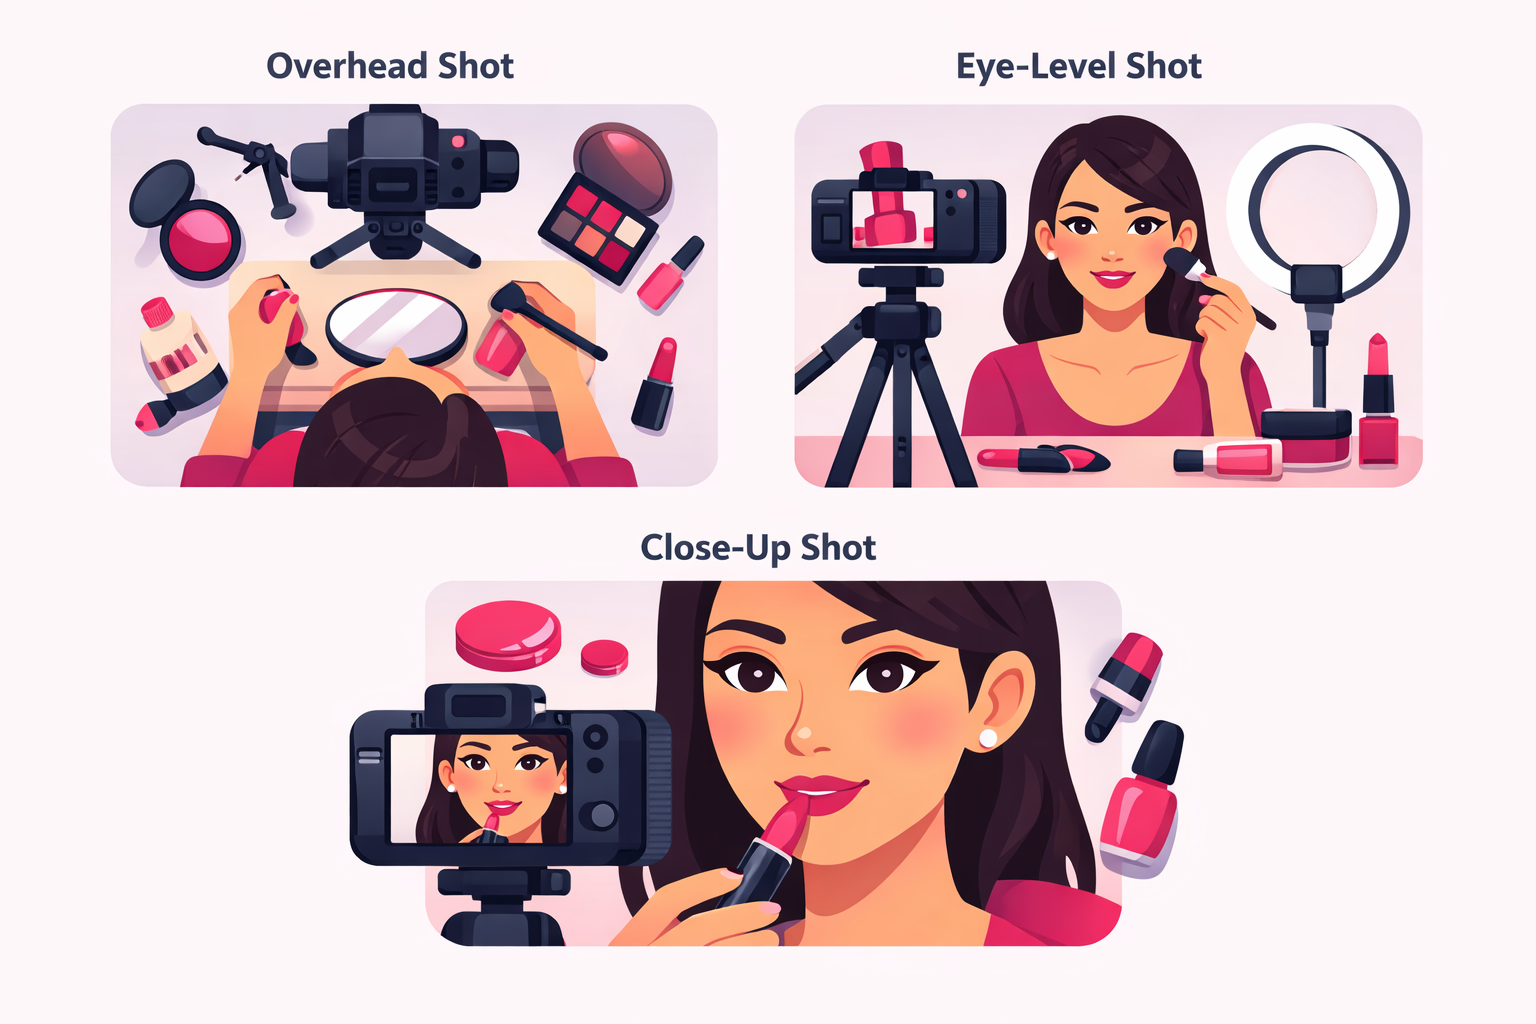
The Three Essential Angles
1. Eye-Level (Primary Angle)
Use for: Talking to camera, showing the full face, before-and-after reveals
This is your main angle. Position your phone at eye level, centered on your face. This is the most natural, conversational angle and should make up about 60% of your tutorial. It's where viewers connect with you as a person.
2. Overhead / Bird's Eye (Detail Angle)
Use for: Product swatches, palette close-ups, product lineup shots
Mount your phone on a gooseneck arm looking straight down. This angle is perfect for showing palettes, swatching colors on your arm, or creating satisfying product flat-lay shots. Use it for about 20% of your content.
3. Close-Up (Impact Angle)
Use for: Eyeliner application, lip color, lash placement, detail blending
Move your phone closer (or use a clip-on macro lens) to capture the precision work that makes tutorials valuable. Close-ups of blending, crisp liner work, or lip application are the shots viewers save and rewatch. Use for the remaining 20%.
Audio Tips for Voiceovers and ASMR
Audio quality matters more than most beauty creators realize. Viewers will tolerate slightly imperfect lighting, but muffled or echo-y audio makes people scroll away instantly.
Three Audio Approaches
Voiceover
Record audio separately after filming. Gives you the most control over pacing and delivery.
Best for: Educational tutorials
Talk-Through
Talk while you apply. More authentic and conversational. Requires multitasking but feels natural.
Best for: Casual/everyday looks
ASMR / No Talk
Focus on satisfying application sounds with text overlays. Trending format with huge engagement.
Best for: Satisfying/relaxing content
If you use voiceover, record it in a quiet room—closets work surprisingly well because the clothes absorb echo. Speak close to the microphone (6-8 inches away) and maintain a consistent volume. The TikTok voiceover tool works fine for quick content, but recording separately gives better quality.
The Filming Process: Step by Step
Now that your space is set up and your gear is ready, here's the exact process for filming a makeup tutorial that keeps viewers watching.
Step 1: Plan Your Hook (First 3 Seconds)
The first 3 seconds determine whether someone watches or scrolls. For makeup tutorials, proven hooks include:
- •The finished look first—Show the end result, then "let me show you how." This is the most reliable hook format.
- •A bold claim—"This $5 foundation outperforms everything in my collection."
- •A relatable problem—"If your concealer always creases, you're probably doing this wrong."
- •A satisfying close-up—Start with a macro shot of product texture, a swatch, or a crisp liner flick.
Step 2: Film Each Step Separately
Don't try to film your entire tutorial in one continuous take. Record each step of your makeup application as a separate clip. This gives you clean cuts in editing and lets you adjust your angle, lighting, or framing between steps without starting over.
Filming Order for a Full-Face Tutorial
- Hook shot—The finished look or opening grab
- Base/skin prep—Moisturizer, primer, SPF (eye-level angle)
- Foundation + concealer—Application and blending (eye-level + close-up)
- Eye makeup—Shadow, liner, lashes (close-up angle essential)
- Brows—Shaping and filling (close-up angle)
- Contour + blush + highlight—Sculpting (eye-level to show placement)
- Lips—Liner + color (close-up)
- Setting + final reveal—Setting spray + the full completed look (eye-level)
Step 3: Get Multiple Takes
Film 2-3 takes of each step, varying your angle slightly or trying different framing. Having options in editing is always better than realizing you only have one usable clip of a key moment. Storage is free—film generously.
Editing Your Makeup Tutorial
Editing is where your raw footage becomes a polished, scroll-stopping tutorial. The good news: you don't need expensive software. The best beauty TikTok creators use free tools.
Best Editing Apps for Beauty TikTok
CapCut
The gold standard for beauty TikTok editing. Free, powerful, and built specifically for TikTok content. Features auto-captions, speed ramping, and beauty-specific templates.
TikTok Built-In Editor
Perfect for simple cuts, text overlays, and adding trending sounds. TikTok may also boost content edited with its native tools.
InShot
Great alternative with easy-to-use transitions, text, and music. Popular with creators who want more control than TikTok's editor offers.
Editing Techniques That Work for Makeup Content
- •Speed ramping—Speed up repetitive steps (blending, buffing) and slow down impressive moments (liner flick, lip application). This keeps pacing tight and highlights your best work.
- •Text overlays for products—Add the product name, shade, and price as text when you first use each product. Viewers screenshot these, which boosts your save rate.
- •Smooth transitions between angles—Cut on motion (mid-brush-stroke) rather than at pauses. This creates a dynamic, professional flow that keeps viewers watching.
- •Auto-captions—Always add captions. Over 80% of TikTok users watch with sound off at least some of the time. CapCut's auto-caption feature makes this effortless.
The 60-90 Second Sweet Spot
For quick makeup looks, aim for 60-90 seconds total. For full-face tutorials, 2-3 minutes works well. The key is no dead air and no wasted frames. Every second should either show a step, name a product, or move the tutorial forward. If a section doesn't add value, cut it.
Common Filming Mistakes to Avoid
These are the mistakes we see most often from beauty creators who are just starting to film—and the fixes are simple once you know what to look for.
Filming in overhead/ceiling lighting only
Ceiling lights create harsh shadows under your eyes, nose, and chin—the exact areas you're trying to showcase. Always use front-facing light (ring light or window) as your primary source.
Using beauty filters while filming
Beauty filters smooth out the detail that makes tutorials valuable. Viewers want to see real skin texture, actual product payoff, and honest blending. Filtered tutorials get called out in the comments and lose trust fast.
Camera too far from your face
If viewers can't see the detail of your eyeshadow blend or liner, the tutorial loses its value. On a phone screen, your face should fill at least 60-70% of the frame for most of the video.
Not naming products on screen
The #1 comment on makeup tutorials is "what product is that?" If you don't add text overlays with product names, you create friction. Make it easy for viewers by adding product names as you use them.
Inconsistent lighting between clips
If your lighting changes between cuts, it looks unprofessional and can make your makeup look different across the tutorial. Lock your lighting settings and don't move your setup between clips.
Growing Your Beauty TikTok After Filming
Great filming is just the foundation. To actually grow your following, you need to pair quality content with smart distribution. Here's how to get your tutorials in front of more people.
Optimize Your Posting Strategy
Post consistently—4-7 times per week works best for beauty content on TikTok. Mix tutorial formats: quick everyday looks on weekdays, full glam tutorials on weekends, and trend-based content whenever something relevant takes off.
Use Hashtags Strategically
Combine high-volume hashtags like #MakeupTutorial (80B+ views) and #MakeupTikTok with niche-specific tags like #EverydayMakeup, #GlamTutorial, #DrugstoreMakeup, or #BridalMakeup. Use 3-5 hashtags per post—enough for discovery without looking spammy.
Amplify Your Best Content
When you notice a tutorial performing above your average—higher saves, longer watch time, more follows—that's the content worth amplifying. Using a TikTok promotion service like Viryze lets you push your best-performing tutorials to targeted audiences of beauty enthusiasts who are most likely to follow you. It's the fastest way to turn great content into real follower growth.
You can also leverage Spark Ads to promote your existing tutorials as ads, maintaining the authentic organic feel while reaching a much larger audience. Beauty creators who combine organic posting with targeted promotion grow their following 3-5x faster than organic-only creators.
How to Film Makeup Tutorials for TikTok: FAQ
What equipment do I need to film makeup tutorials for TikTok?
At minimum, you need a smartphone with a good camera (iPhone 12+ or Samsung Galaxy S21+), a ring light ($20-$50), and a phone tripod with an adjustable arm ($15-$25). Optional upgrades include an external microphone for voiceover clarity and a secondary light source to eliminate shadows. Total starter budget is under $100.
What is the best camera angle for makeup tutorials on TikTok?
The best approach uses multiple angles: eye-level for talking to camera and showing the full face (60% of footage), overhead for product swatches and palette close-ups (20%), and extreme close-ups for detail work like eyeliner or lip application (20%). Switching between angles keeps viewers engaged and increases watch time.
How long should a TikTok makeup tutorial be?
The sweet spot is 60-90 seconds for a quick look and 2-3 minutes for a full-face tutorial. Videos under 60 seconds get higher completion rates which the algorithm rewards, while longer tutorials work for detailed transformations. Always show the most impressive part of the look in the first 3 seconds.
How do I get good lighting for makeup tutorials at home?
Position a ring light directly in front of your face at eye level for even, shadow-free lighting. Set the color temperature to 5000-5500K (daylight) for true-to-life color representation. Adding a secondary light at a 45-degree angle fills remaining shadows. Avoid overhead ceiling lights—they create unflattering shadows under the eyes and nose.
What apps should I use to edit makeup tutorials for TikTok?
CapCut is the most popular editor for beauty TikTok creators—it's free, integrates directly with TikTok, and offers speed ramping, auto-captions, and beauty-specific templates. TikTok's built-in editor works for simple cuts and text overlays. For more advanced editing, InShot and VN Video Editor are excellent free alternatives.
Ready to Get Your Makeup Tutorials Seen?
Now that you know how to film professional-quality makeup tutorials, the next step is getting them in front of the right audience. Viryze helps beauty creators reach targeted audiences through optimized TikTok advertising. We test multiple audience segments to find the makeup enthusiasts most likely to follow and engage with your content—so your beautifully-filmed tutorials actually get the attention they deserve.
Continue Reading
TikTok for Beauty Creators: Complete Guide
Master TikTok as a beauty creator with proven strategies for makeup, skincare, and building your brand.
Read More →Beauty TikTok Content Ideas: 50+ Videos That Go Viral
Never run out of beauty content ideas again with 50+ proven video concepts that drive views and followers.
Read More →Skincare TikTok Marketing: Build Your Brand
Learn how to market your skincare brand on TikTok with proven strategies for routine videos, ingredient education, and growth.
Read More →
Head of Creator Success at Viryze
TikTok growth strategist helping creators reach their first 100K followers through data-driven promotion strategies.