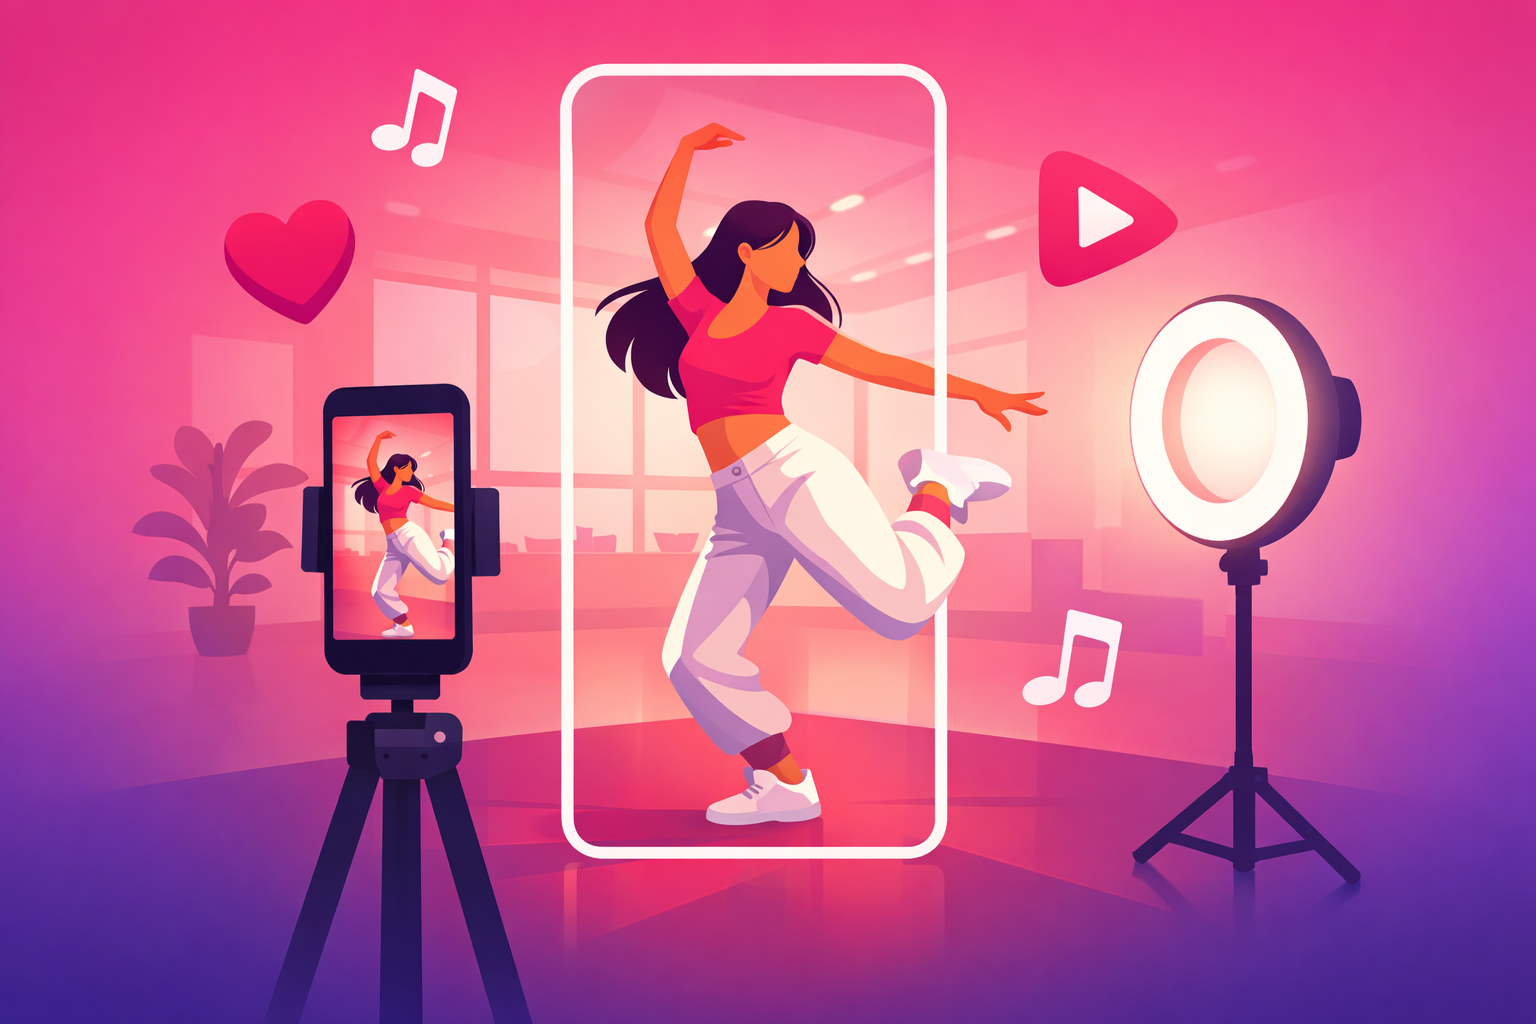
Here's the frustrating part of dancing on TikTok: you can hit the routine perfectly in the studio mirror, then watch the clip back and something's off. Your feet are cut off. The lighting is murky. The hardest move you nailed somehow looks soft and unremarkable on screen. The dancing was great - the filming let it down.
That gap is more common than you'd think, and it's the reason talented dancers plateau while less skilled creators rack up millions of views. The good news: filming a clean dance video is not a talent. It's a setup. Once you lock in the right height, frame, and light, every routine you shoot comes out looking professional - without a studio, a crew, or an expensive camera.
This guide walks through the entire process: the kit that actually matters, the one-take setup that makes any routine look pro, full-body vertical framing, lighting without a studio, filming to the beat, and a film-day workflow that turns a single routine into a week of clips. If you want the bigger-picture strategy first, start with our complete TikTok for dancers guide, then come back here for the setup.
The honest summary:
- Chest height, full body, straight on. This one framing rule fixes most bad-looking dance clips instantly.
- Light from the front, never behind. A window or one cheap panel in front of you beats any expensive camera lit badly.
- Play the sound out loud. It keeps you on beat and makes syncing the edit effortless.
- Film for the loop. Lead with the hardest move and design the clip to replay seamlessly.
What's Inside
- 1. Why Filming - Not Dancing - Holds Most Creators Back
- 2. Your Dance Filming Kit: What You Actually Need
- 3. The One-Take Setup: Step by Step
- 4. Framing for the Vertical Feed
- 5. Lighting Your Routine Without a Studio
- 6. Sound & Sync: Filming to the Beat
- 7. The Beat-Drop Open: Filming for the Hook
- 8. The Edit: From Raw Take to Loopable Clip
- 9. One Routine, Five Clips: The Film-Day Plan
- 10. When to Amplify What You Filmed
- Frequently Asked Questions
1. Why Filming - Not Dancing - Holds Most Creators Back
Most dancers assume their growth problem is the dancing itself - that they need harder moves, a cleaner technique, or a more original routine. It's almost never that. The bottleneck is that a great routine filmed badly reads as a mediocre one on a phone screen. The viewer never sees the skill you actually have.
Think about what the algorithm is reading in your first second. If your feet are cropped, the room is dim, or the camera is hunting for focus as you move, the viewer's thumb keeps scrolling before your best move ever lands. Watch-through rate is the dominant ranking signal on TikTok, and bad filming kills it before the routine has a chance.
Here's the reframe that changes everything: your phone is a passive piece of equipment, not a second job. You set it up once, correctly, and then you forget it exists and just dance. The dancers who post clean clips consistently aren't better camera operators - they've built a repeatable setup so the filming takes care of itself.
We call the core discipline The One-Take Habit™: a fixed phone at chest height, your full body in frame, front lighting, the sound playing out loud, and one clean take. Master that and you'll stop reshooting the same routine ten times - and your clips will finally look as good as your dancing.
2. Your Dance Filming Kit: What You Actually Need
You almost certainly already own the only piece that truly matters - a phone with a decent camera. Everything else is cheap and optional, and you can add it over time. Don't let "I need better gear" become the reason you never film. Here's the kit in priority order:
- A tripod or phone stand. This is the single most important purchase. A $15-25 tripod that holds your phone steady at chest height transforms your footage instantly - no more propping it on a chair at a weird angle.
- Clear floor space and a simple background. A two-by-two-meter clear area against a plain wall reads far better than a bigger, cluttered room. The eye should land on you, not the laundry pile behind you.
- A front-facing light. A big window is free and excellent. If you film at night, one affordable LED panel or ring light placed in front of you covers almost every situation.
- A speaker (or your phone) to play sound out loud. Hearing the track while you dance keeps you on beat and makes the edit sync itself. Any Bluetooth speaker works.
- A free vertical editing app. CapCut, your phone's native editor, or TikTok itself. You do not need desktop software to make a great dance clip.
Notice what's not on this list: a gimbal, a cinema camera, a full lighting kit, a studio rental. Dance content rewards energy and clarity, not cinematic polish. A phone on a tripod facing a window will out-perform expensive gear used carelessly every single time.
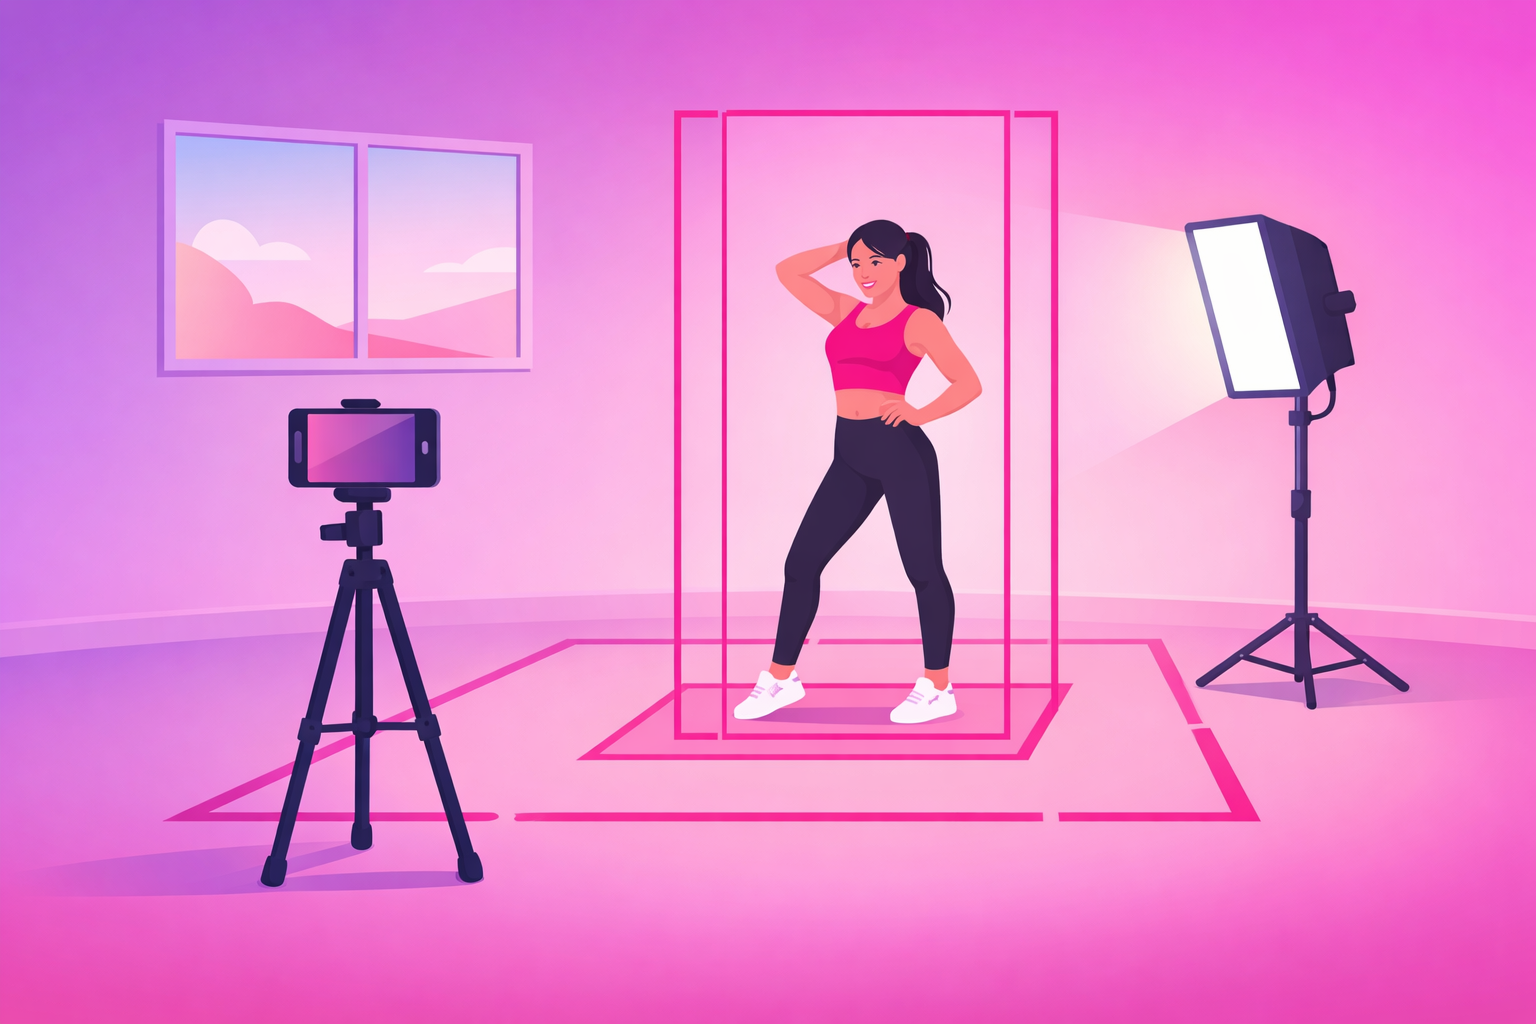
3. The One-Take Setup: Step by Step
This is the core workflow - the repeatable setup you run every time you film. It takes about two minutes to dial in and then runs itself while you dance. Follow these six steps in order:
- Clear and frame your space. Pick a spot with clean floor space and a simple background. Set your phone vertically - a horizontal clip gets squeezed into a tiny strip on the For You feed and wastes most of your screen.
- Set the camera at chest height, full body in frame. Mount the phone on the tripod at roughly chest height and step back until your whole body fits - head and feet both visible, with a little breathing room above and below. Keep the phone perfectly level.
- Light yourself from the front. Position your window or panel in front of you so the light lands on your face and body. Never stand with the bright source behind you, or the camera turns you into a dark silhouette.
- Lock focus and exposure. Tap and hold on yourself on the screen until the focus/exposure lock engages. This stops the camera from hunting or flickering brightness every time you move across the frame.
- Play the sound out loud and film one clean take. Play your audio through a speaker so you stay on beat, then perform full, uninterrupted takes. One complete run beats ten stop-start fragments you'll struggle to stitch together later.
- Review for feet, frame, and sharpness. Before you stop, watch the take back: nothing cut off, you stayed in frame, and the hardest move is crisp. Reshoot now while you're still warmed up and set up.
The discipline that ties it together is trusting the setup. Once the phone is locked at the right height and lit, your only job is to dance full-out and stay inside your frame. Resist the urge to keep adjusting the phone between every take - dial it in once, then perform.
Pro Tip
Set your camera to record at 60fps if it can. The extra frames let you ramp the single hardest move - a freeze, a spin, a clean hit - into smooth slow motion in the edit without it looking choppy, while the rest of the routine stays full speed for a tight loop. It costs you nothing at film time and gives you far more to work with later.
4. Framing for the Vertical Feed
Framing is where most dance clips win or lose before a single move happens. TikTok is a tall 9:16 vertical frame watched on a phone held at arm's length, and dance is a full-body art form - which makes framing trickier than it looks. Get these four rules right and your routine reads clearly every time:
- Frame for your biggest move, not your starting pose. A pose that fits perfectly can still crop your highest jump or widest step. Frame for the full range of the routine, then check your most extreme moment stays in.
- Keep your head and feet in - footwork sells the move. Cutting off feet is the most common dance-clip mistake. Viewers read skill from clean footwork, so leave a small margin above your head and below your feet.
- Stay in the center third. TikTok's caption, buttons, and username overlays eat the bottom and right edges. Keep your key movement centered so nothing important hides behind the interface.
- Mark your Floor Box. Put a small marker - a piece of tape, a sock - at the front and side edges of where you can move without leaving the shot, then do one test take to confirm. This single habit eliminates cut-off clips.
Chest height, straight on, is the angle that flatters almost every style. It keeps your proportions natural and your footwork visible. Filming from the floor up distorts your legs; a high angle looking down shrinks you and flattens jumps. Break the rule only on purpose - a slightly lower angle, for instance, can emphasize height on a big jump.
5. Lighting Your Routine Without a Studio
Lighting sounds intimidating, but for dance it comes down to one rule: light yourself evenly from the front. When the main light is in front of you, every move is clearly visible and your clip looks crisp and professional. When it's behind you, the camera exposes for the bright background and turns you into a shadow.
Here's how to get clean light in any space:
- Daytime: face a big window. A large window is the best free light source there is. Stand facing it - never with your back to it - so the soft daylight lands evenly across you.
- Night or dark rooms: one front light. An affordable LED panel or ring light placed in front of you, slightly above eye level, covers almost everything. One good front light beats three random lamps scattered around the room.
- Avoid the single overhead light. A ceiling light directly above you casts harsh shadows under your eyes and flattens your movement. If it's all you have, add any light from the front to balance it.
- Keep it consistent. Lock your exposure (step 4) so the brightness doesn't pulse as you move between lighter and darker parts of the frame.
You don't need color gels, multiple sources, or a softbox kit to start. Even, front-facing light that lets every move read clearly is the entire goal. Polish can come later, once you've learned what your audience responds to.
6. Sound & Sync: Filming to the Beat
Dance lives and dies on sound, and the single biggest time-saver in the entire process is to play the track out loud while you film. When you can hear the beat, you stay in time naturally, and your movement lines up with the audio with almost no work in the edit. Dancing in silence and trying to sync afterward is a nightmare you never need to suffer.
A few sound habits keep your clips tight and sync-ready:
- Use the real audio you'll post with. Film to the exact sound you plan to add in the app, so your movement and the final track match frame for frame.
- Hit a clear marker on the first beat. Start each take with an obvious move on the downbeat - it gives you a clean sync point to line everything up in the edit.
- Mind rising sounds. The track you choose matters as much as the dancing. Choreographing to an audio that's climbing - not saturated - gives your clip a tailwind. Our TikTok for musicians guide digs into how sound drives reach on the platform.
- Re-add the sound in-app when you post. Use the trending audio from TikTok's library on the final upload so the platform connects your clip to that sound's discovery feed.
Get the sound right at film time and your edit becomes mostly trimming, not wrestling. That speed is what lets you turn a single film session into multiple clips without burning a whole evening syncing footage.
7. The Beat-Drop Open: Filming for the Hook
A perfectly filmed routine still flops if the first second is a slow walk-up or a count-in. The fix is what we call The Beat-Drop Open: lead with the single most impressive moment of the routine - the hardest hit, the cleanest spin, the sharpest freeze - on the very first frame, then let the rest play out.
Filming for the hook changes what you capture. Make sure you get a clean, sharp version of your big moment that you can cut to instantly, and design the clip so it loops - when the last frame flows back into the first without a visible cut, viewers rewatch without realizing it, quietly pushing your watch-through past 100%.
Loopability is the secret weapon of dance content. A tight, eight-count routine watched twice in a single scroll beats a long one watched halfway every time. Keep most clips between 8 and 25 seconds, front-load the payoff, and cut anything between the hook and the big move that doesn't earn its place. For the full picture of which signals decide whether a clip travels, see our algorithm ranking factors breakdown.

8. The Edit: From Raw Take to Loopable Clip
You've got a clean take - now a quick edit turns it into a clip people actually finish. Because you filmed it right, the edit is mostly trimming and a couple of touches. The structure is almost always the same, which makes it fast and repeatable:
- Cut to the hook on frame one. Trim so the clip opens on your hardest move or sharpest pose. Delete the walk-in, the count, and any dead air before the dancing starts.
- Trim to the beat. Top and tail the clip on clean musical beats so it feels intentional, and trim down to the tightest version of the routine that still lands.
- Speed-ramp one moment. If you filmed at 60fps, slow your single best move into smooth slow motion for emphasis, then snap back to full speed. One ramp, not five.
- Make it loop. Match the last frame to the first so the clip replays seamlessly. A clean loop is the cheapest watch-through boost you'll ever get.
- Add a hook line and captions. Most viewers start muted, so a short on-screen line - "the move that took me 3 months" - carries the hook in the first frame and lifts retention.
Keep your finished clips short and punchy to start. Tight, payoff-first, loopable videos train the algorithm that your account holds attention - and watch-through is the signal that decides whether a clip spreads. For a vault of formats to point your new setup at, the 50+ dance content ideas guide pairs directly with this filming workflow, and our complete TikTok growth strategy guide covers turning consistent posting into compounding growth.
9. One Routine, Five Clips: The Film-Day Plan
The real payoff of a dialed-in setup is leverage: a single film session should feed your feed for a week. Because the camera is already locked at the right height and lit, capturing extra angles and versions costs you almost nothing. Here's how one routine becomes five distinct clips:
- Clip 1 - The full-speed hook. The beat-drop open, the tight loopable routine. Your flagship reach-driver.
- Clip 2 - The slow-then-fast tutorial. Teach the hardest section slow, then hit it at tempo. Tutorials earn the saves that signal quality.
- Clip 3 - The behind-the-scenes. A rehearsal run, a blooper, or the "getting it wrong before getting it right." Personality builds the follow.
- Clip 4 - The progress or angle variation. The same routine from a new angle, mirrored, or paired with an earlier attempt for a day-1-vs-now contrast.
- Clip 5 - The duet invite or POV. A version framed to invite duets, or with a POV text line that reframes the routine for a new audience.
Five clips from one session, staggered across the week so your account never goes quiet. Decide which versions you want before you start filming - that intention is what turns "I'll film if I'm inspired" into a content engine that runs every time you set up the tripod.
10. When to Amplify What You Filmed
Once you're filming clean clips consistently, you'll start producing the occasional routine that clearly outperforms the rest - a clip that earns rewatches, saves, and shares well above your account average. That clip is a candidate for paid amplification. Promotion doesn't rescue a flat routine; it pours fuel on signals the algorithm is already reading.
A dance clip is ready for selective amplification when it clears your organic signal threshold:
- Completion rate above 60% on short clips (loopable routines often clear 100% on rewatches).
- Share rate above 1.0% of views.
- Save rate above 1.0% of views (tutorials run higher as people save to learn later).
- Follow rate above 0.6% of viewers - or, if you teach or run a studio, a clear spike in profile visits and class link clicks.
Well-filmed choreography and tutorial clips make the best promotion candidates because clean framing and a strong hook are exactly what keep paid traffic engaged - so the budget preserves the organic signal that keeps the clip traveling after the campaign ends. That selective approach is exactly what our TikTok promotion service is built around - we amplify dance clips that have already proven themselves rather than spraying budget across every upload. For the mechanics of paid amplification, see our Spark Ads guide and the complete TikTok advertising guide.
Frequently Asked Questions
How do you film yourself dancing for TikTok?
Set your phone on a tripod at about chest height, framed vertically, and step back until your whole body fits in the shot with a little room above your head and below your feet. Light yourself from the front, lock focus and exposure by tapping and holding on yourself, then play the sound out loud and perform full, uninterrupted takes. The whole trick is making the phone passive: you set it up once, hit record, and dance like it isn't there. Filming yourself well is far more about the setup than the equipment - a $20 tripod and a window beat an expensive camera held badly.
What is the best camera height and angle to film dance videos?
Chest height, straight on, is the default that flatters almost every routine. It keeps your proportions natural, shows your footwork clearly, and matches the eye level viewers expect. Avoid filming from the floor up, which distorts your legs and torso, or from a high angle looking down, which shrinks you and flattens jumps. Set the phone a step or two back so your full body fits, keep it perfectly level, and only break the chest-height rule on purpose - for example, a slightly lower angle to emphasize height on a jump.
How do I get good lighting for dance videos without a studio?
Light yourself from the front with a soft, even source and you've solved 90% of it. A large window during the day is the best free light there is - face it, don't stand with your back to it, or the camera will turn you into a silhouette. Indoors or at night, one affordable LED panel or ring light placed in front of you, slightly above eye level, does the job. Avoid relying on a single overhead ceiling light, which casts harsh shadows under your eyes and flattens movement. The goal is simply to be lit clearly and evenly so every move reads.
How do I keep my whole body in frame while dancing?
Mark your space before you film. Step back from the camera until your head and feet both fit with margin, then put a small marker - a piece of tape, a sock, a water bottle - at the front and side edges of where you can move without leaving the shot. We call this the Floor Box. Do one quick test take and watch it back to confirm your biggest move - your highest jump and your widest step - all stay inside the frame. Most cut-off dance clips happen because the dancer framed for a still pose, not for the full range of the routine.
Should I film dance videos in slow motion or at 60fps?
Film at 60fps whenever your phone allows it, then decide in the edit. Shooting at 60 frames per second gives you about twice the slow-motion headroom, so you can ramp the single hardest move - a freeze, a spin, a clean hit - into smooth slow motion without it looking choppy, while keeping the rest of the routine at full speed for a tight, loopable clip. You don't have to film in slow motion; you just want the extra frames so the option exists later. It costs you nothing at film time and gives you far more to work with.
Filmed a routine that's taking off? Amplify it.
Once your setup is producing clean, loopable clips on a regular basis, the next move is to put budget behind the ones that break out. Viryze is built for exactly that - we only promote clips that have already cleared the organic signal threshold, so your spend compounds your best routines instead of rescuing your weakest. Whether you're building an audience, selling a course, or filling a class schedule, selective amplification is the difference between burning budget and buying real growth.
See how selective amplification worksRelated Reading
- TikTok for Dancers: The Complete 2026 Guide - the full playbook for growing and monetizing a dance audience.
- Dance TikTok Content Ideas: 50+ Video Concepts - the formats to point your new filming setup at.
- The Complete TikTok Algorithm Guide - the ranking signals that decide which dance clips travel.
- The Complete TikTok Growth Strategy Guide - turning consistent posting into compounding growth.
- TikTok Spark Ads Guide - the format every dancer should default to for amplification.

Head of Creator Success at Viryze
TikTok growth strategist helping creators reach their first 100K followers through data-driven promotion strategies.