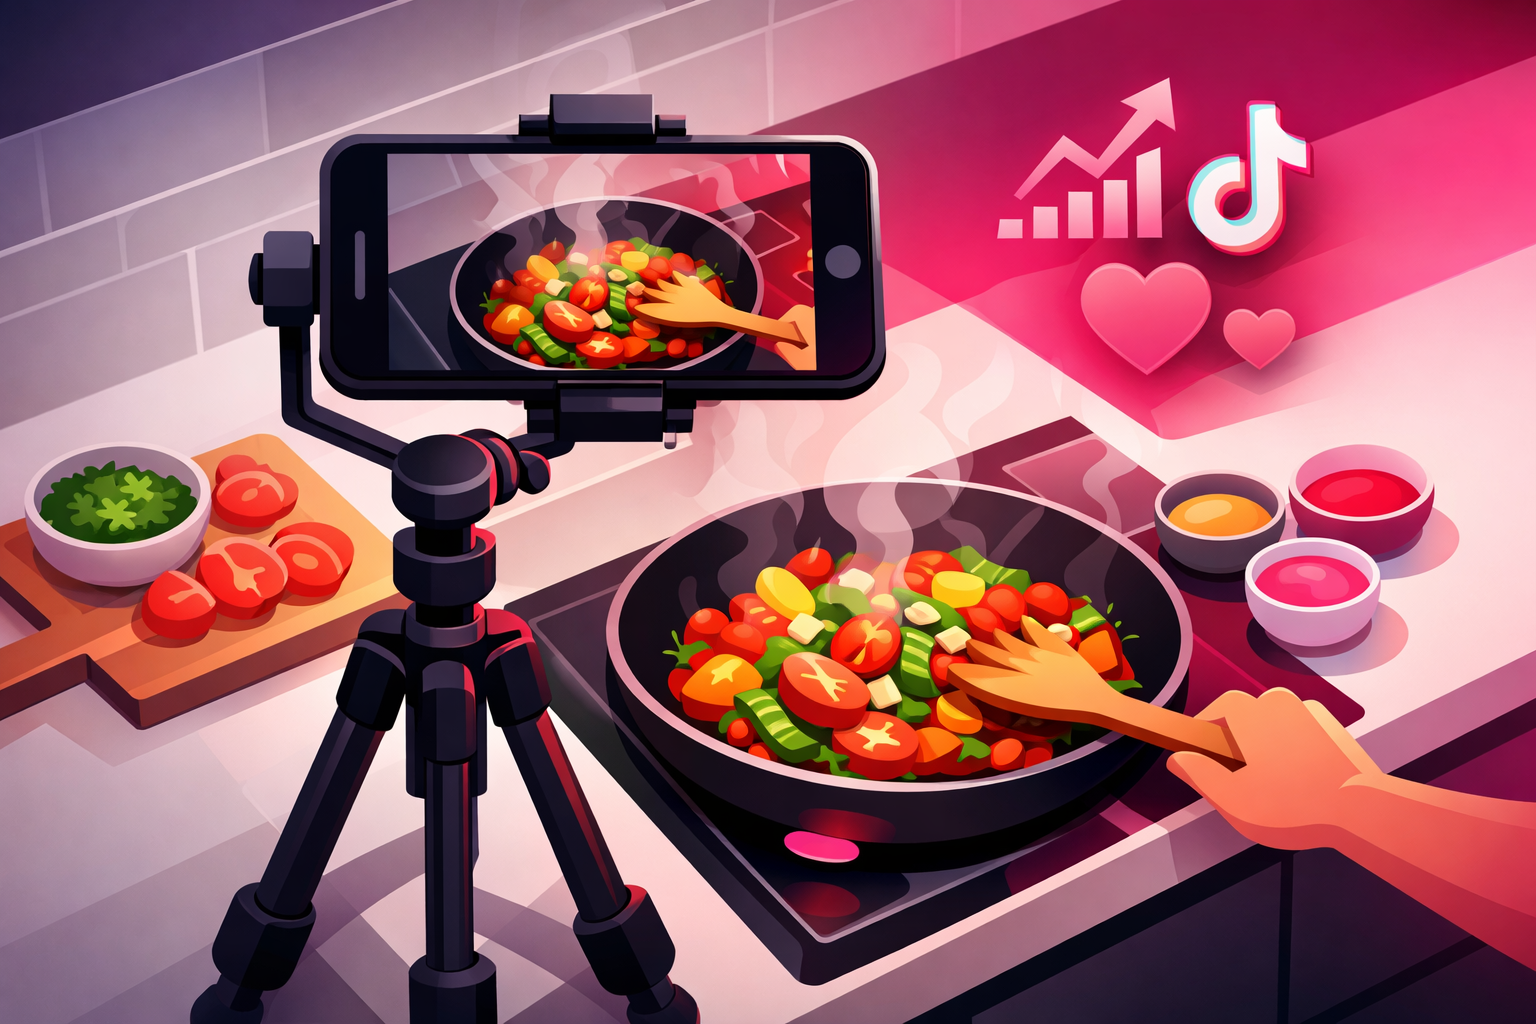
Why Most Recipe Videos Fail (And How to Fix Yours)
You've made delicious food a hundred times. But when you hit record, something goes wrong. The lighting makes your golden crust look gray. Your overhead shot cuts off half the plate. The finished dish doesn't look nearly as appetizing on screen as it does in real life.
Here's the truth: filming food is a completely different skill than cooking food. The creators going viral on FoodTok aren't necessarily better cooks than you—they just understand how to make food look irresistible on camera.
In this guide, you'll learn the exact filming techniques that separate amateur food content from viral recipe videos. From camera angles to lighting setups, from plating tricks to editing secrets—everything you need to make your recipes stop the scroll.
Essential Equipment for Recipe Videos
The good news? You don't need a professional studio to create viral recipe content. Some of the biggest food creators film entirely on their phones. What matters is using what you have strategically.
The Must-Have Setup (Under $100)
- Smartphone (any recent model): iPhone 12+ or any Android phone from the last 3 years shoots video quality that rivals professional cameras
- Tripod with overhead arm ($25-50): The most important purchase. Look for one that extends over your cooking area for those essential top-down shots
- Ring light or window access: A $20 ring light transforms amateur footage. Alternatively, film near a large window during daylight
- Phone mount with adjustable angle: Your tripod should allow quick switches between overhead and 45-degree angles
Nice-to-Have Upgrades
- External microphone ($30-80): For recipes with voiceover—built-in phone mics pick up background noise
- Second light source ($25+): Eliminates shadows when filming from multiple angles
- Reflector board ($15): Bounces natural light to brighten shadows
- Backdrop or clean surface: Marble contact paper or wooden cutting boards create professional-looking backgrounds for under $20
Pro Tip
Before investing in gear, master the fundamentals with what you have. The creators who go viral do so because of technique, not equipment. Your iPhone and a window can outperform a $2,000 camera in the wrong hands.
The 3 Camera Angles Every Recipe Video Needs
Professional food content uses a mix of camera angles to keep viewers engaged. Here are the three shots you need to master—and when to use each one.
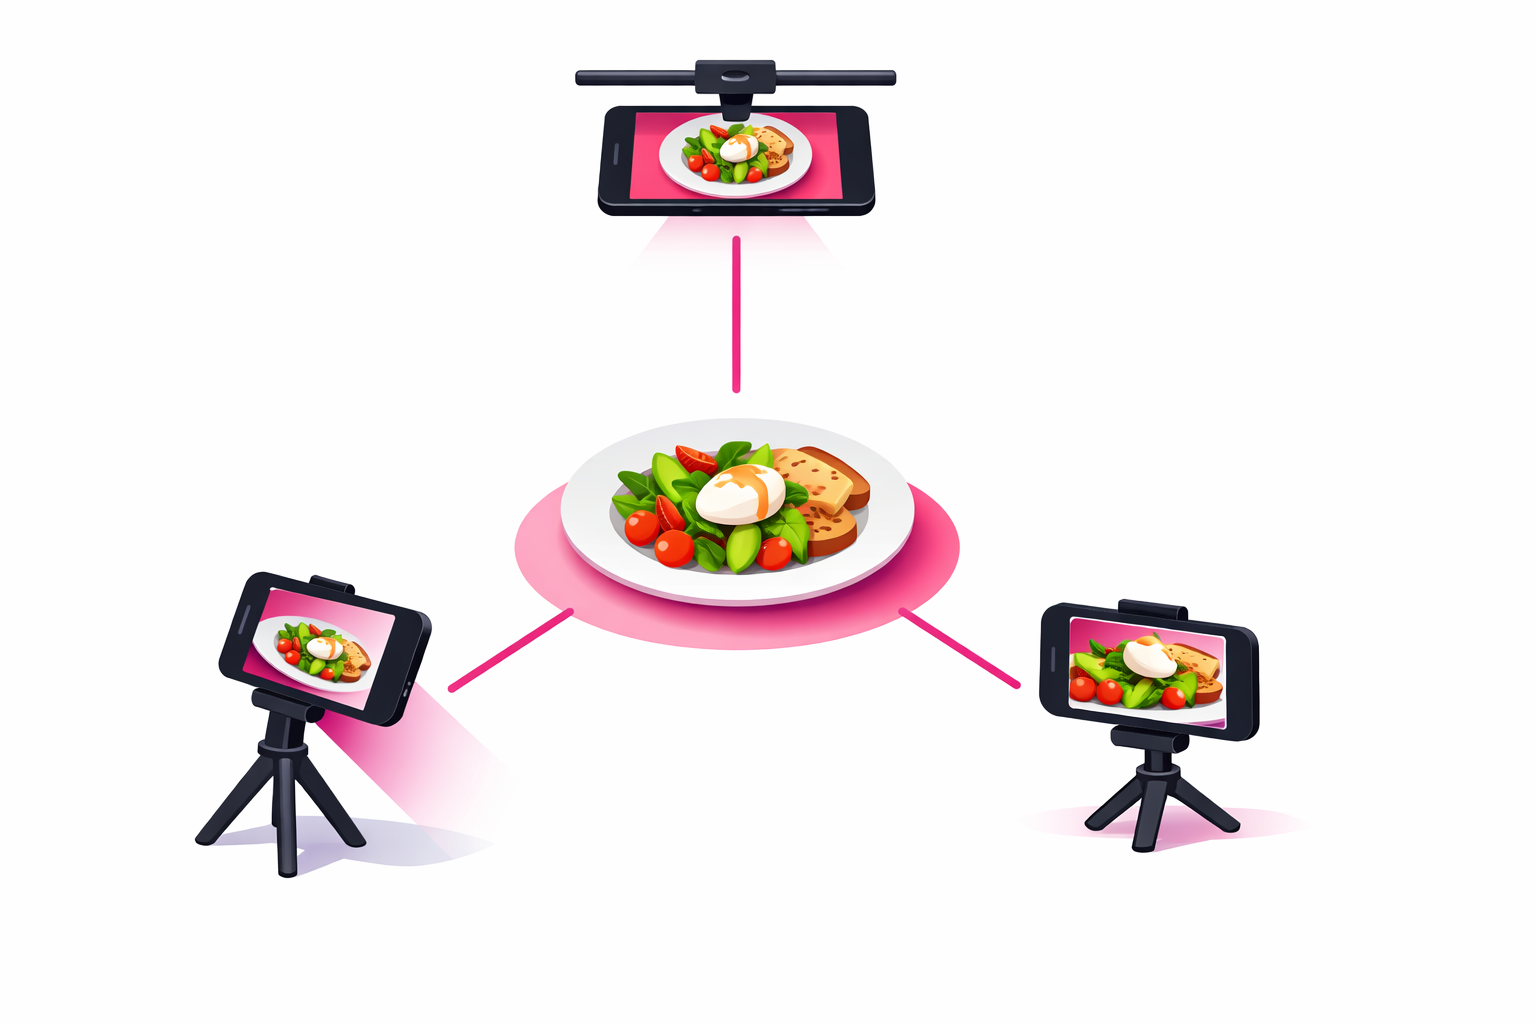
1. The Overhead Shot (Top-Down)
The overhead shot is the signature angle of food content. It shows the entire cooking area, lets viewers see exactly what you're doing with your hands, and creates that satisfying bird's-eye view that makes food content so addictive.
- Best for: Ingredient prep, mixing bowls, plating, anything where hand movements tell the story
- Setup tip: Position your tripod arm directly over your work surface. Ensure the entire plate/bowl fits in frame with some margin
- Common mistake: Filming too close. Leave room for your hands to enter the frame without blocking key actions
2. The 45-Degree Angle (Hero Shot)
This is your "money shot"—the angle that makes food look the most appetizing. It mimics how we naturally look at food on a table and creates depth that flat overhead shots can't capture.
- Best for: Final dish reveal, tall foods (burgers, layered desserts), anything with height
- Setup tip: Position camera at roughly the height of the food, tilted down 30-45 degrees. Get close—fill at least 70% of the frame with your dish
- Common mistake: Too much background. The food should dominate, not your kitchen clutter
3. The Close-Up (Detail Shot)
Close-ups capture the textures and details that make mouths water. The crispy edge of a pancake, bubbling cheese, steam rising from a bowl—these details trigger the emotional response that gets saves and shares.
- Best for: Texture reveals, the "first bite" moment, melting/bubbling/sizzling action
- Setup tip: Use your phone's portrait mode or get within 6-12 inches of the subject. Let the background blur naturally
- Common mistake: Shaky footage. Brace your arms or use a stabilizer for these intimate shots
The 3-Angle Formula
Film every major step from at least two angles. Your final video should cut between overhead (process), 45-degree (hero shots), and close-ups (details). This variety keeps viewers watching through the entire recipe. Check out the complete food creator guide for more filming strategies.
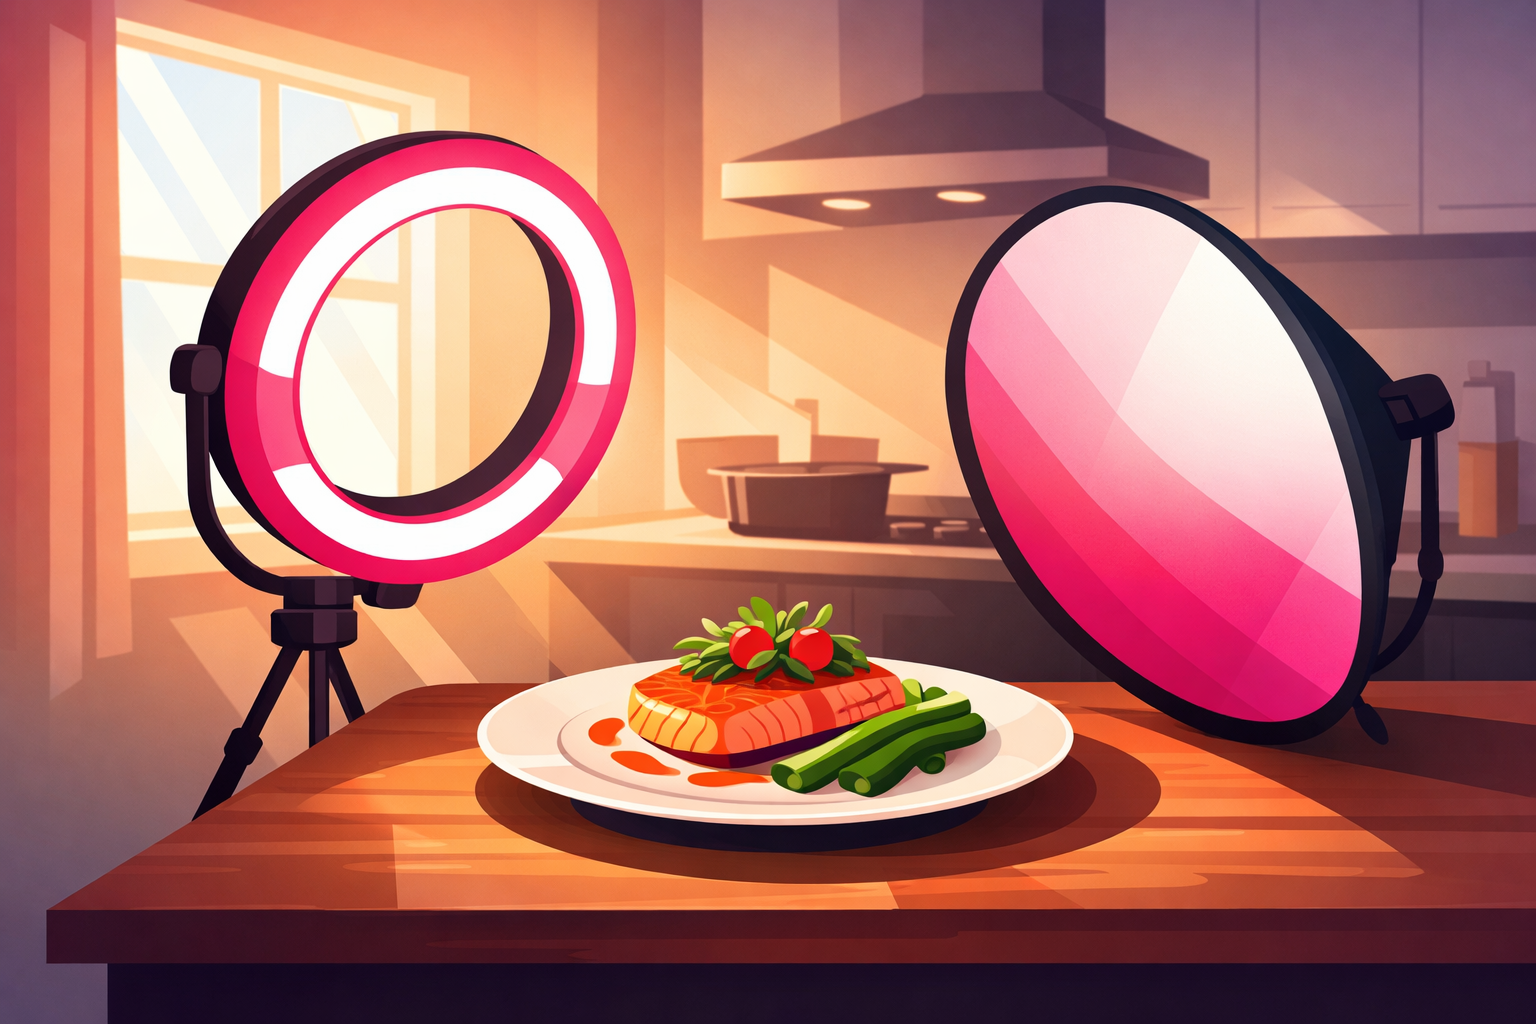
Lighting That Makes Food Look Irresistible
Lighting is the single biggest factor separating amateur food videos from professional content. Bad lighting makes a perfectly cooked steak look gray and unappetizing. Good lighting makes a simple salad look like it belongs in a magazine.
Natural Light: The Gold Standard
Natural light produces the most appetizing food footage. Here's how to use it effectively:
- Position your setup near a large window—north-facing windows provide consistent, soft light throughout the day
- Shoot during "golden hours"—early morning or late afternoon light is warm and flattering
- Avoid direct sunlight—it creates harsh shadows. Diffuse it with a white curtain or shoot when clouds soften the light
- Use a white board or foam core opposite the window to bounce light and fill shadows
Artificial Light Setup
When natural light isn't available (or you want to film at night), here's how to replicate it:
- Ring lights: Great for even, shadow-free lighting. Position at a 45-degree angle to your subject, not directly in front
- Softbox or LED panels: Provide broader, more natural-looking light than ring lights
- Color temperature matters: Use 5000-5500K (daylight balanced) bulbs for accurate food colors
- Two-light setup: Main light at 45 degrees + fill light (or reflector) on the opposite side eliminates harsh shadows
Lighting Red Flags
- ✕Overhead kitchen lights only: Creates flat, institutional-looking footage
- ✕Mixed color temperatures: Daylight window + warm kitchen bulbs = color chaos
- ✕Your shadow in frame: Position the light so you're not blocking it during cooking
- ✕Too bright or too dim: Use consistent lighting you can replicate for every video
Food Styling Secrets That Make Dishes Pop
Professional food stylists use tricks that make ordinary dishes look extraordinary on camera. Here are the techniques you can steal for your TikTok content.
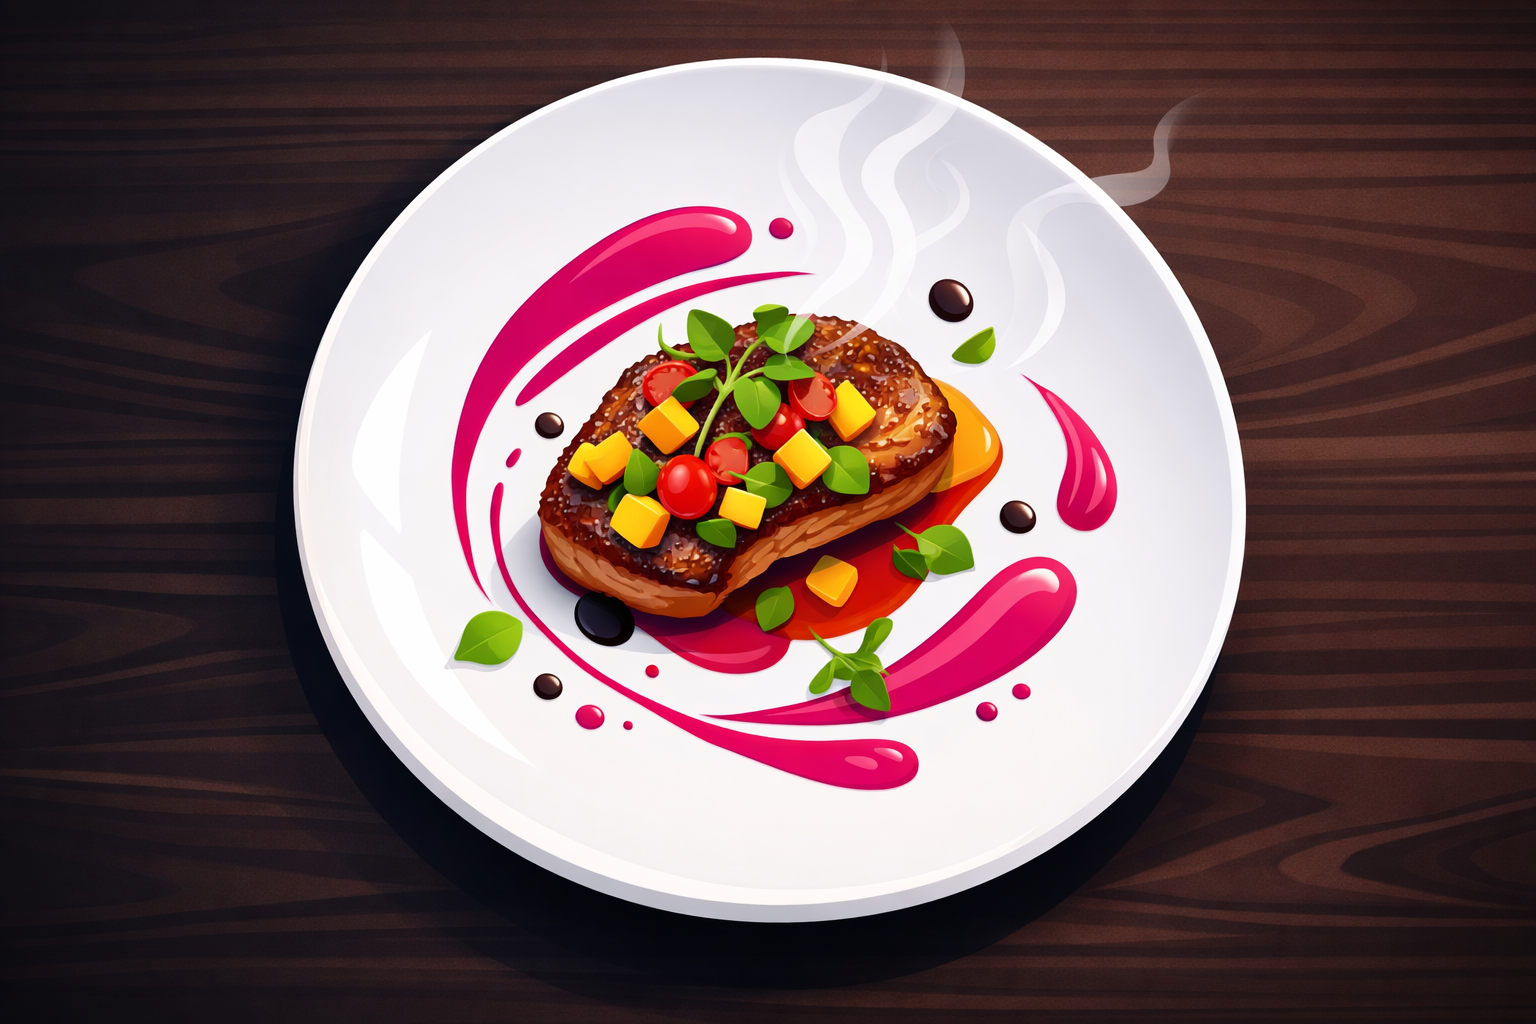
The Rule of Thirds
Don't center your food in the middle of the plate or frame. Position the main subject at one of the intersection points when you divide the frame into thirds. This creates visual interest and leaves room for garnishes or sauce drizzles.
Color Contrast
Food that contrasts with its plate looks more vibrant. White plates make colorful food pop. Dark plates (slate, black ceramic) work beautifully for lighter dishes. Always add a contrasting garnish—a sprinkle of fresh herbs, a drizzle of sauce, a pop of color.
Odd Numbers
Plate odd numbers of items (3 cookies, 5 meatballs, 7 shrimp). Odd numbers are more visually interesting than even groups. This is a fundamental design principle that professional stylists use instinctively.
Food Styling Quick Wins
- •Oil brush for shine: Lightly brush olive oil on proteins and vegetables for an appetizing gleam
- •Undercook for filming: Food continues cooking under lights. Vegetables stay vibrant when slightly undercooked
- •Fresh herbs last: Add delicate garnishes right before filming—they wilt quickly
- •Wipe plate edges: A clean plate edge separates amateur from professional presentation
- •Height builds drama: Stack, layer, and build upward when possible—flat food looks flat on camera
Pro Tip
Ready to put your perfectly-styled recipes in front of hungry audiences? Viryze's TikTok promotion service helps food creators reach thousands of foodies who actively engage with recipe content. Your beautiful food deserves to be seen by people who will save, share, and follow.
The Recipe Video Filming Workflow
Most creators waste time filming chaotically, then struggle in editing. Professional food content follows a structured workflow that saves hours of editing time.
Pre-Production (10 minutes)
- Plan your shots: Write out each step and which angle you'll use
- Prep ALL ingredients: Mise en place isn't just for cooking—it's essential for filming
- Clean your space: Remove clutter. Check through your camera—what's in frame?
- Set up lighting: Don't wait until you're mid-cook to realize the light isn't right
- Test your angles: Do a quick recording to check framing before you start cooking
During Filming
- Film each step separately: Stop and start recording between actions
- Get more footage than you need: It's easier to cut than to re-cook
- Film the "hero shot" first: Your finished dish looks best fresh—don't let it sit while you film process shots
- Capture the action moments: Pouring, flipping, sizzling—these are your most engaging clips
- Record multiple takes: If something looks awkward, do it again
The "Start With the End" Rule
Always film your finished dish first, before you start cooking the "process" footage. Why? Because your hero shot needs to be at its visual peak. A dish that's been sitting under lights for 30 minutes while you film won't look as appetizing. Many top creators actually make two versions—one for filming the process, one for the final beauty shot.
Hooks That Stop the Scroll
The TikTok algorithm judges your video in the first 1-2 seconds. If you can't capture attention immediately, nothing else matters. Here's what works for food content:
Visual Hooks
- The finished dish first: Show the mouth-watering result before showing how you made it
- Action in the first frame: Start with something happening—pouring, cutting, flipping
- The cheese pull: Melty, stretchy shots are algorithmically irresistible
- Steam and sizzle: Indicators of fresh, hot food grab attention
Text Hooks
Since 85% of TikTok is watched without sound, your text overlay is crucial. Place it at the top or center of your first frame:
- "The recipe that went viral last week"
- "My secret to perfect [dish name]"
- "Restaurant-quality [dish] at home"
- "Why didn't I know this sooner?"
- "$5 dinner that tastes like $50"
Hook Mistakes to Avoid
- ✕Starting with "Hey guys!" or a lengthy introduction
- ✕Beginning with raw ingredients sitting on a counter
- ✕A black screen or logo animation
- ✕Asking viewers to like and follow before delivering value
Editing for Maximum Watch Time
The goal isn't to show everything—it's to keep viewers watching until the end. Here's how to edit recipe videos that hold attention:
Pacing Is Everything
- Keep clips short: 2-4 seconds per step maximum. Cut anything that doesn't add value
- Use jump cuts: Don't be afraid of "jumpy" editing—it keeps energy high
- Speed up slow moments: Time-lapses for chopping, 2x speed for stirring
- Slow down key moments: The pour, the flip, the first bite—these deserve slow motion
Audio Strategy
- Trending sounds: Using popular audio increases your chances of reaching new audiences
- ASMR cooking sounds: The sizzle, the chop, the crunch—these are incredibly satisfying
- Voiceover: Clear, concise narration of steps (record separately for better quality)
- Text captions: Always add captions—they boost accessibility and watch time
Recommended Editing Apps
Free Options
- •CapCut: Best free option, perfect for TikTok
- •TikTok Editor: Built-in, surprisingly capable
- •iMovie: Good for beginners on iOS
Paid Options
- •Adobe Premiere Rush: Pro features, mobile-friendly
- •Final Cut Pro: Industry standard for Mac
- •DaVinci Resolve: Free pro-level software
Common Filming Mistakes and How to Fix Them
Mistakes That Kill Recipe Videos
- 1.Filming in portrait orientation poorly: Leaving too much dead space above and below the food. Fill the frame—get closer or zoom in.
- 2.Dirty lens: Check and wipe your phone lens before every filming session. Kitchen grease and fingerprints destroy sharpness.
- 3.Inconsistent lighting: Don't switch between natural and artificial light mid-video—it creates jarring color shifts.
- 4.Forgetting sound-off viewers: If your recipe makes no sense without audio, you're losing 85% of potential viewers.
- 5.No clear recipe in comments: Viewers who want to save your recipe need the full written version. Always pin it.
Frequently Asked Questions
Can I film recipe videos without a tripod?
Technically yes, but you'll be limited to handheld angles and won't be able to show your hands working. A $25 tripod with an overhead arm is the single best investment for food content. It's worth skipping other gear to get one.
How do I film without my shadow in the shot?
Position your main light source to the side of your cooking area, not behind you. For overhead shots, use two light sources on opposite sides to eliminate shadows. A reflector on the opposite side of your main light also helps fill in shadow areas.
Should I use my front or back camera?
Always use your phone's back camera—it has significantly better quality than the front camera. If you need to see yourself while filming, use a small mirror positioned behind your phone, or get a phone mount that lets you see the screen from in front of the camera.
How do I make my food look fresh under hot lights?
Work quickly and in stages. Film your hero shot first before the food has time to wilt or lose its shine. Keep spare garnishes ready. Use a spray bottle with water for vegetables that need to look dewy. For hot dishes, film the steam shots immediately—steam disappears fast.
Your First Recipe Video Action Plan
Don't try to implement everything at once. Here's your step-by-step path to better recipe videos:
Week 1: Master the Basics
- Set up your filming area near a window
- Practice the overhead shot with your tripod
- Film one simple recipe using natural light
- Edit to under 60 seconds
Week 2: Add Polish
- Introduce a second angle (45-degree hero shot)
- Practice plating with garnishes and color contrast
- Add text overlays to your videos
- Experiment with trending sounds
Week 3: Refine and Grow
- Add a ring light or improve your lighting setup
- Master the hook—test different opening shots
- Post consistently (the growth guide covers optimal posting schedules)
- Consider promoting your best-performing video with Viryze's TikTok advertising
Start Filming Like a Pro
Viral recipe videos aren't lucky accidents. They're the result of understanding how to make food look irresistible on camera, then presenting it in a way that captures attention and holds it. The techniques in this guide are what separates the food creators with millions of views from those struggling to break 1,000.
Your cooking skills got you this far. Now it's time to develop filming skills that match. Start with one improvement at a time—better lighting today, stronger hooks next week, tighter editing the week after.
The creators dominating FoodTok right now weren't born knowing how to film. They learned. And with the techniques in this guide, so will you.
Ready to Amplify Your Best Recipe Content?
You've put in the work to create stunning food content. Now put it in front of thousands of food lovers who are actively looking for recipes to try. Viryze handles TikTok advertising for food creators—we test audiences, optimize for followers, and grow your presence while you focus on creating delicious content.
Start Growing Your Food FollowingContinue Reading
TikTok for Food Creators: Complete 2025 Guide
Master TikTok as a food creator from profile setup to monetization strategies.
Read More →Case Study: How a Food Creator Gained 90K Followers
See the exact strategy that took one food creator from 10K to 100K in 3 months.
Read More →Understanding TikTok's Algorithm: What Really Matters
Learn how TikTok's algorithm decides which videos to show and how to optimize for it.
Read More →
Head of Creator Success at Viryze
TikTok growth strategist helping creators reach their first 100K followers through data-driven promotion strategies.