You just finished a project that actually turned out great—maybe a built-in bookshelf, a tiled backsplash, or a flipped piece of thrifted furniture. You pulled out your phone to film it, but the footage looks dark, shaky, and nothing like the satisfying DIY videos you scroll through at night. Somehow the transformation that felt huge in person looks completely underwhelming on camera.
Filming DIY content is its own skill. The difference between a video that gets 200 views and one that hits a million isn't the quality of the project—it's the way the project is captured, cut, and revealed. And the good news is, the techniques are learnable. The biggest HomeTok creators on the platform aren't filmmakers. They're regular people who figured out a repeatable filming system and stuck with it.
This guide walks you through the exact setup, camera angles, and editing techniques that turn weekend projects into viral TikToks. Everything here works whether you're filming in a finished workshop or a one-car garage with a single bare bulb.
Why filming quality matters for DIY content:
- The reveal is the payoff—viewers click through your video because they want to see the transformation. A muddy, poorly lit reveal kills the magic
- Save rates drive distribution—DIY videos get bookmarked more than almost any other category. Clear filming helps viewers save your tutorial to try later
- Brand partnerships depend on it—tool companies and home improvement brands only partner with creators whose videos look polished and professional
- Completion rate signals quality—well-paced videos keep viewers watching until the end, which tells the algorithm to show your content to more people
What You'll Learn
- 1. Setting Up Your DIY Filming Workspace
- 2. The Five Camera Angles Every DIY Creator Needs
- 3. Filming Power Tools, Hand Tools, and Messy Work
- 4. Time-Lapses, Transitions, and Satisfying Reveals
- 5. Editing DIY Videos for Maximum Retention
- 6. Common Filming Mistakes DIY Creators Make
- 7. Getting Your Videos in Front of the Right Audience
- 8. Frequently Asked Questions
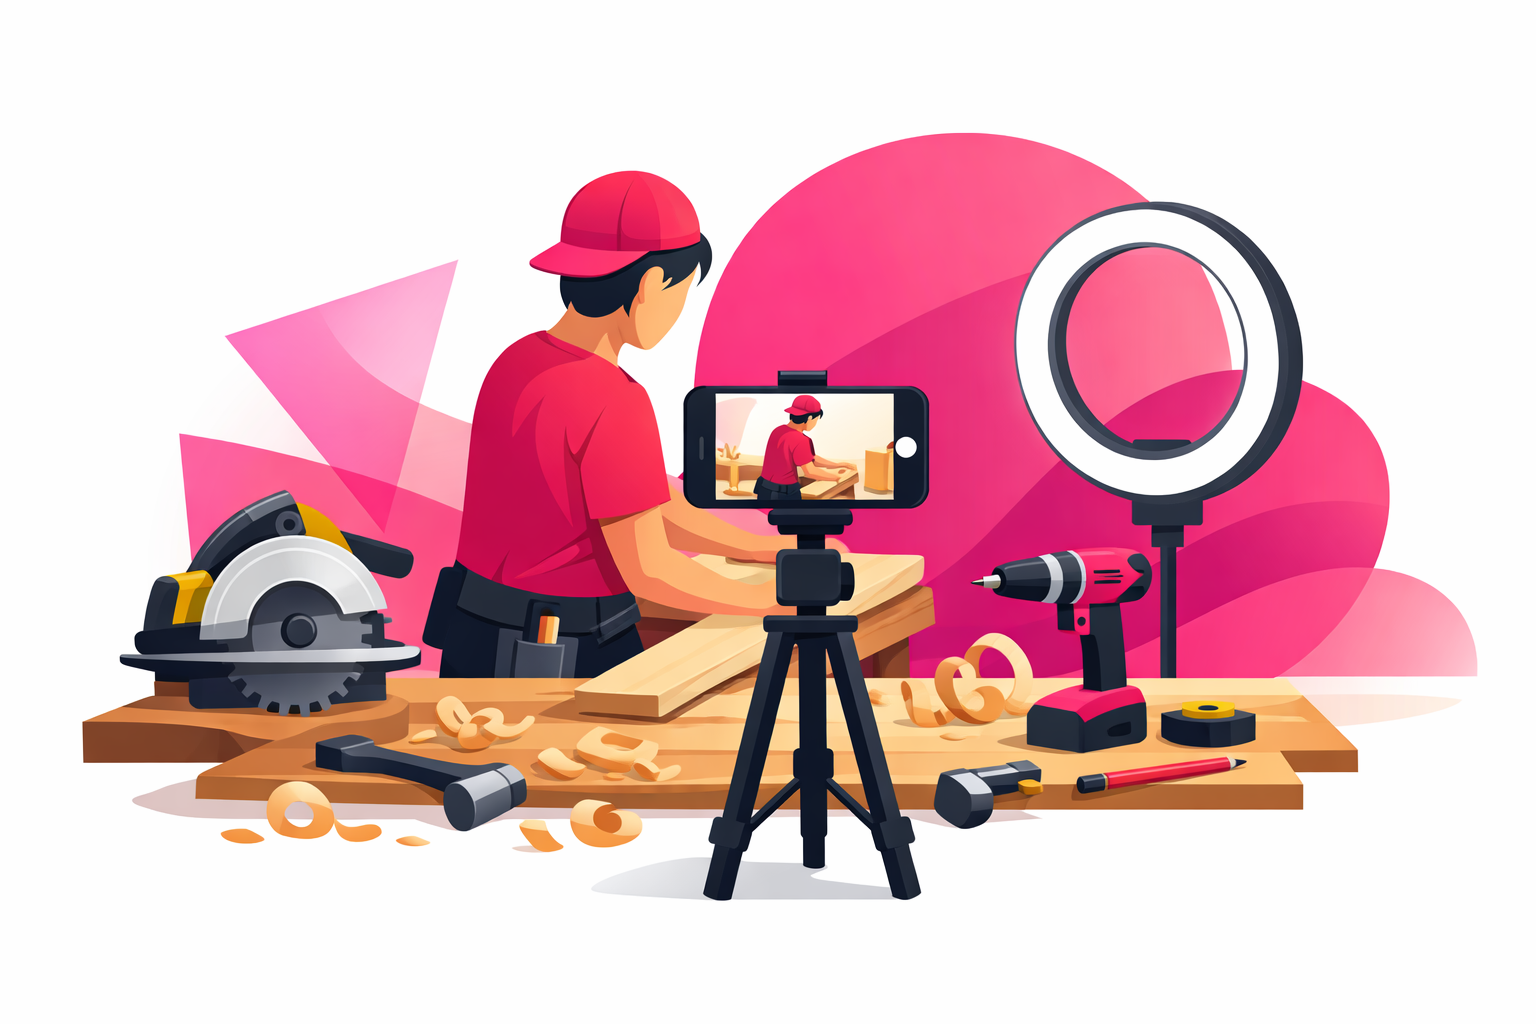
1. Setting Up Your DIY Filming Workspace
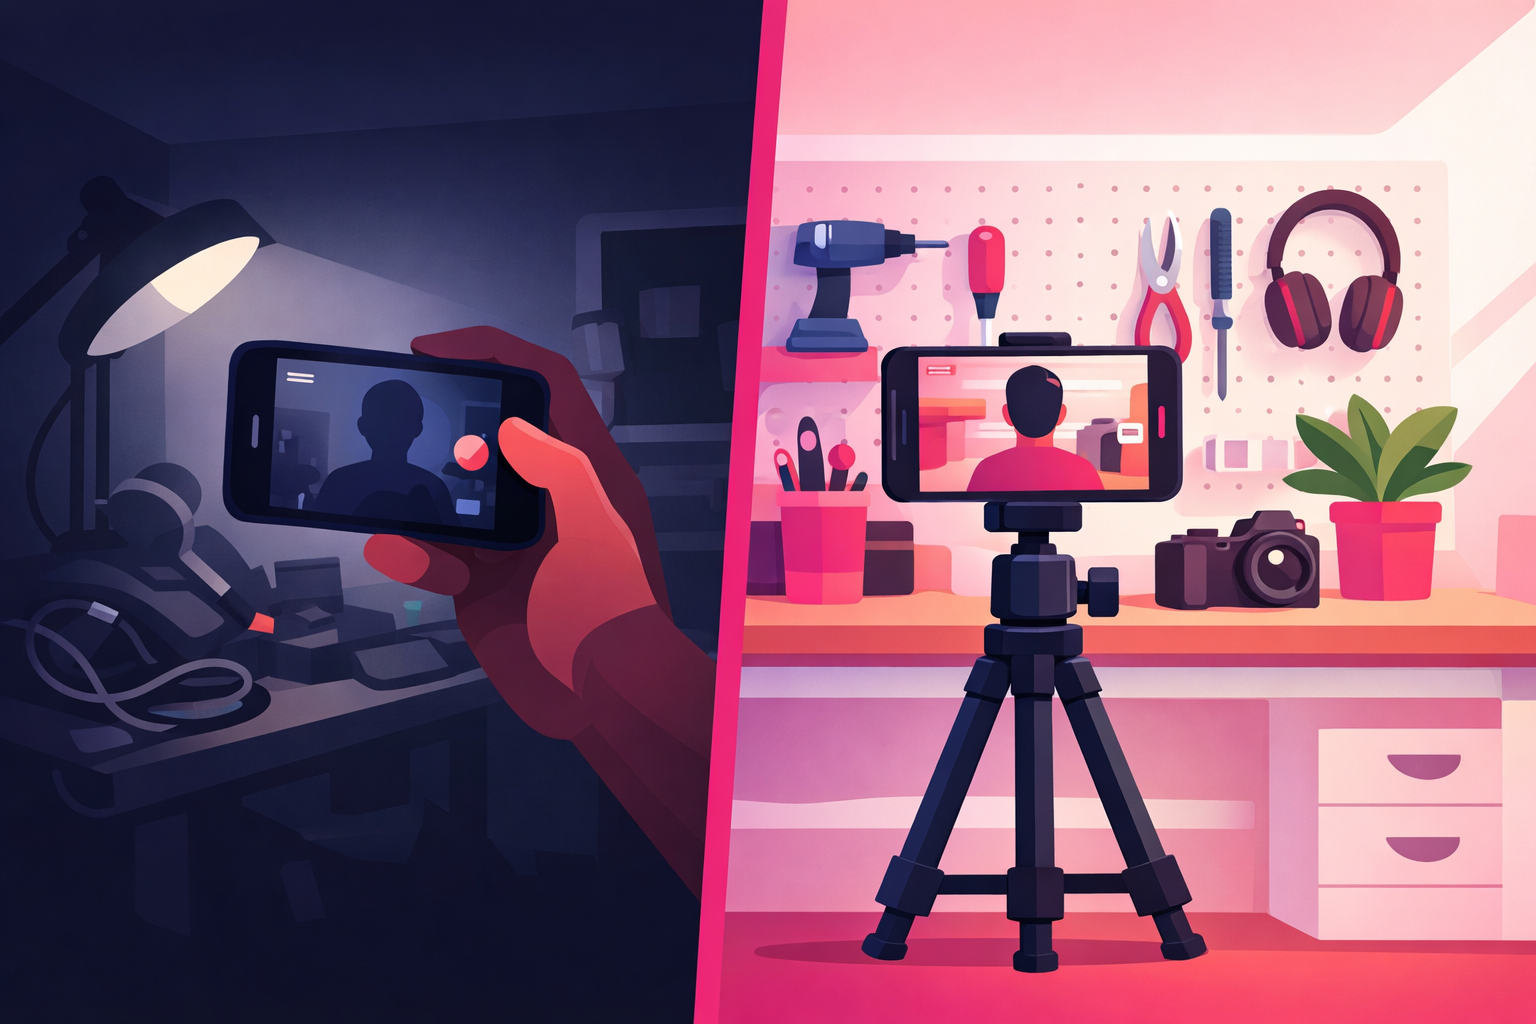
DIY filming lives and dies by two things: lighting and dust protection. Most garages, basements, and workshops are too dark to film in natively, and sawdust destroys phone microphones and camera lenses over time. Solve these two problems and your footage immediately looks more intentional than 80% of what's already on HomeTok.
The Starter Setup ($0)
If you're starting with just a phone, here's how to make it work:
- Lighting: Open the garage door for natural daylight. If you work at night, move every lamp you own to the work area. Bounce light off a white wall or a white sheet to soften harsh shadows
- Stability: Stack paint cans or scrap wood to prop your phone up at different angles. Shaky handheld footage is the single biggest amateur tell
- Dust protection: Wrap your phone in a clear ziplock bag or slide it into a plastic phone case you don't mind scratching
- Audio: Get within 2-3 feet of your phone for narration, or record voiceover indoors later where there's no shop noise
The Level-Up Setup ($75-150)
Once you're posting consistently and ready to invest, these purchases make the biggest difference for DIY content specifically:
- Gorillapod or flexible tripod ($25-40): Wraps around ladders, pipes, sawhorses, and shelving to get angles a normal tripod can't. The most useful piece of gear a DIY creator can own
- Phone clamp mount ($15-20): Clips onto your workbench, a 2x4, or the rim of a bucket. Perfect for locking off a shot while your hands are full
- Portable LED panel ($30-60): Battery-powered, weatherproof, and bright enough to light dim garages and basements. Mount it on a cheap light stand or clamp it to a shelf
- Clip-on lavalier mic ($20-30): Plugs into your phone and clips to your shirt. Captures clear narration even with a compressor running in the background
Pre-Production Checklist
Before you start any project you plan to film, spend five minutes on these steps. They will save you hours of reshoots later:
- Film the “before” from multiple angles—once the project starts, you can never go back and get the starting point again
- Lay out your tools and materials—a top-down flat-lay of your supplies makes a strong B-roll shot and a great intro clip
- Clear and stage the work area—viewers judge your work by the space around it. Sweep, tidy, and organize before filming
- Charge everything and clear phone storage—dead batteries and “storage full” errors mid-project are how great content gets lost
2. The Five Camera Angles Every DIY Creator Needs
Variety in camera angles is what separates a HomeTok tutorial from a home video. You don't need expensive equipment to rotate between shots—you just need to know which angles to hit and when. Here are the five workhorse shots that every viral DIY video uses.
Angle 1: Overhead Top-Down (The Hands Shot)
Mount your phone directly above your work surface pointing straight down. This shot shows your hands manipulating materials, drawing measurements, or spreading caulk. It's the most satisfying angle for close-up work and the reason so many craft and painting TikToks go viral. A $25 overhead phone mount that clamps to a desk or shelf is all you need.
Angle 2: Side Profile (The Workbench Shot)
Set your phone on a tripod 4-6 feet away, aimed at your workbench from the side. This is your establishing shot—it shows you in context, with your tools and workspace visible. Frame yourself from the chest up with a little headroom. This angle is perfect for narration and talking-to-camera moments.
Angle 3: First-Person POV
Clip your phone to the brim of a hat, clamp it to your chest with a harness, or mount it on a sawhorse at head height. The result is a first-person view of your hands working from your perspective. POV shots pull viewers into the project like they're doing it themselves—one of the strongest retention hooks in DIY content.
Angle 4: Wide Establishing Shot
Back the camera up and show the entire room or project area. Use this at the very start of a video to orient viewers, and again at the reveal to show the full transformation in context. Wide shots give your edit room to breathe between close-ups.
Angle 5: Detail Macro
Get as close as your phone will focus to capture texture, finish, grain, or joinery. A tight shot of freshly sanded wood, a clean miter joint, or glossy paint catching the light adds production value and emphasizes craftsmanship. Use macro shots during the reveal sequence for maximum impact.
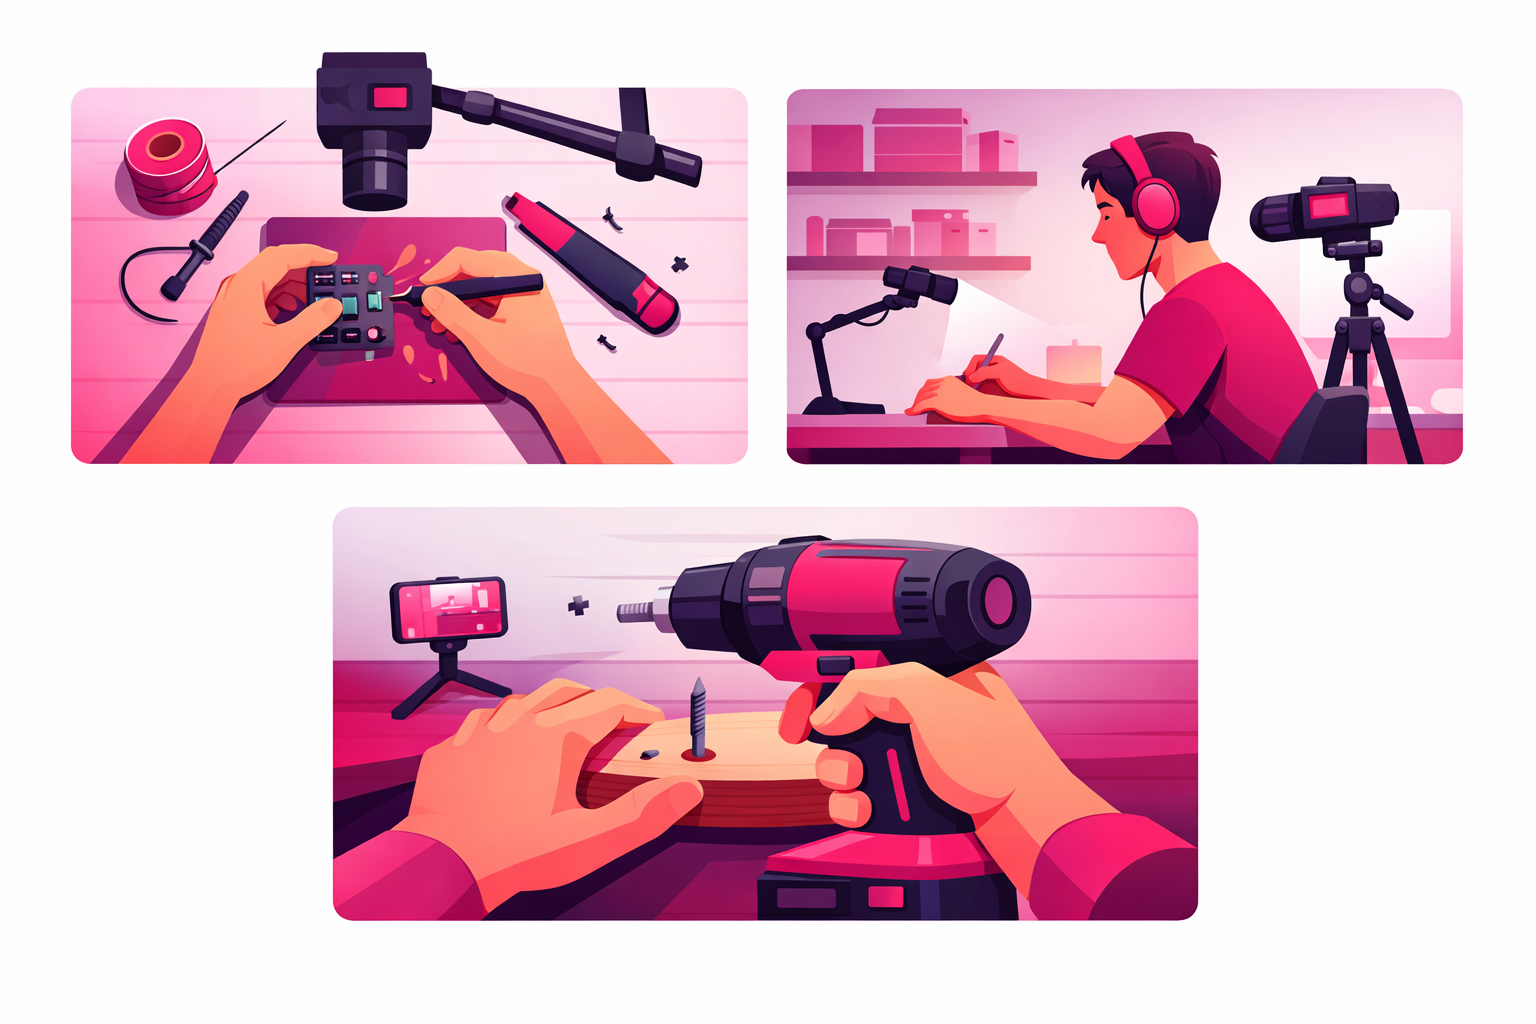
3. Filming Power Tools, Hand Tools, and Messy Work
DIY content involves noise, dust, splashes, and risk. Good filming technique keeps your footage clean and your body safe. Here's how to capture the satisfying tool shots viewers love without destroying your phone or losing a finger.
Power Tool Safety Rules on Camera
- Never hold your phone while a tool is running. Mount it, clamp it, or set it down somewhere secure
- Wear safety gear every time. Glasses, gloves, and hearing protection on camera model good practice and keep comments positive
- Film cuts and finish shots separately. Give each task your full attention—don't try to operate a miter saw and adjust framing at the same time
- Keep your phone out of the strike zone. Saws throw chips and blades break. Mount the camera where a worst-case scenario won't destroy it
Audio Tips for Loud Environments
Power tools overwhelm phone mics and turn narration into mush. Handle audio with one of these approaches:
- Record voiceover after the fact. Film the project in silence, then narrate over the footage in a quiet room using TikTok's voiceover feature or CapCut
- Use a lavalier mic under ear protection. A wired clip-on mic captures your voice clearly even with power tools running in the background
- Rely on text overlays and sound effects. Many DIY videos use no narration at all—just trending audio, tool sounds, and bold on-screen captions
Shots That Always Work for Tools
- The trigger pull: Close-up on your finger pulling the trigger of a drill, nailer, or sprayer. Adds suspense before the action
- Sawdust flying: Side angle, slightly backlit, at 60fps for satisfying slow-motion chips and sawdust
- Paint pouring: Overhead shot of paint flowing out of the can into a tray. One of the most bookmarked moves in HomeTok
- The first cut: Wide or side-profile shot of the blade making contact, held for 2-3 seconds before jump-cutting forward
- Tool close-ups: Tight macro shots of the tool itself before you use it. Gear-porn style shots perform well with the DIY audience
4. Time-Lapses, Transitions, and Satisfying Reveals
The DIY viewer's favorite moment is watching hours of work compress into seconds. This is where the time-lapse, the transition, and the reveal do the heavy lifting. Master these three techniques and you unlock the most shareable moments in HomeTok.
Filming Time-Lapses
Your phone's built-in time-lapse mode is all you need. Set your phone on a tripod, lock the angle, plug it into a charger, and let it run. Time-lapses are the secret weapon for long tasks:
- Sanding, painting, and staining: Two-hour jobs become five-second clips that show dramatic color change
- Tiling, grouting, and caulking: The transformation from empty wall to finished backsplash is pure visual payoff
- Room transformations: Mount the phone high in a corner and time-lapse an entire kitchen renovation over days or weeks
- Furniture flips: A single time-lapse of a piece going from thrift store beat-up to showroom quality is a guaranteed scroll-stopper
TikTok-Native Transitions That Work for DIY
These simple transitions require no editing skill and consistently perform:
The Hand-Swipe
Swipe your hand across the camera, then cut to the next shot in the same direction. Creates the illusion of instant change
The Paint-Dip
Point the camera at the project, then dip a brush into paint directly in front of the lens. Cut to the finished painted version
The Tool-Reveal
Start with a close-up of a tool filling the frame. Pull it back to reveal the finished project underneath
The Match-Cut
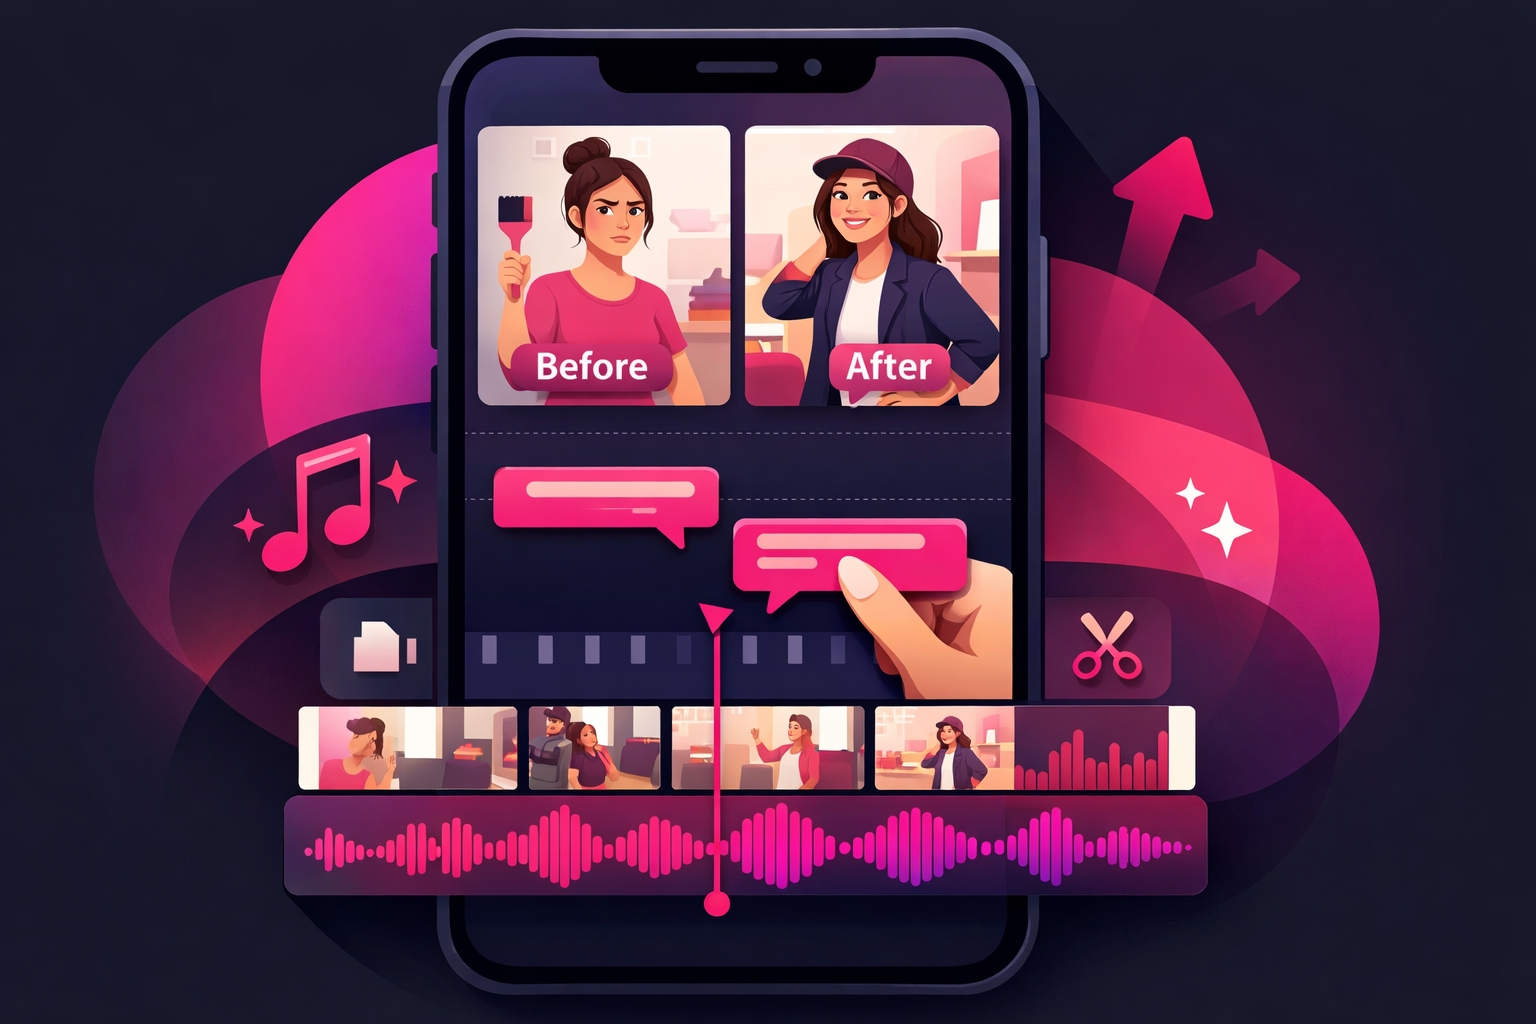
Film yourself in the same position, same angle, before and after the project. Cut between the two for an instant transformation moment
Nailing the Reveal
The reveal is why viewers stayed through your video. Build it up and deliver the payoff:
- Hold a beat before the reveal. Let a half-second of anticipation build
- Cut to a wide shot first. Show the full context, then cut to close-up details
- Use great lighting. The reveal shot is the one you'll use as your thumbnail. Make it count
- Add a quick “before” reference. Flash the starting state for half a second to make the transformation feel huge
- Hold on the final shot. Let viewers linger for 1-2 seconds so they can appreciate the result
5. Editing DIY Videos for Maximum Retention
Editing is where a dozen clips from a weekend project become a viral video. The goal isn't flashy transitions or complicated effects—it's pacing, clarity, and a satisfying arc from hook to reveal. Every second someone watches pushes the algorithm to show your content to more people.
The DIY Video Structure
Use this framework for any project video:
- Hook (0-3 seconds): Either a direct face-cam promise (“I turned this $20 thrift find into a $400 piece”) or a quick before-state flash followed by a teaser of the reveal
- Project intro (3-8 seconds): Show the starting state, the materials, and what you're going to do
- The build (8-50 seconds): Cut together 4-8 of your best clips rotating between angles, with a clear sequence of steps
- Build-up to reveal (50-55 seconds): Pause on a detail shot, add tension, maybe a quick text overlay (“wait for it”)
- The reveal (55-75 seconds): Wide shot of the finished result, then close-ups of the best details, then the before/after comparison
- CTA (last 3 seconds): “Follow for more projects” or “Save this for your next weekend”
Essential Editing Techniques
- Jump cuts: Remove every dead moment between actions. DIY footage should feel tight and information-dense
- Captions: Add bold, high-contrast text captions to every video. Most TikTok users scroll with sound off, and captions also double as on-screen instructions
- Speed ramps: Speed up repetitive work (screwing in boards, sanding) to 2x or 4x. Slow down the satisfying moments (paint pour, blade cut) with 0.5x
- Sound effects: Subtle whoosh sounds on transitions, or a satisfying “click” when a joint fits together, adds polish without being annoying
- Trending audio: Use popular sounds as a base layer at low volume (10-20%) so your tool sounds and narration stay clear
Free Editing Apps for DIY Creators
- CapCut: The go-to editor for HomeTok. Built-in auto-captions, speed ramps, keyframe animations, and templates designed for TikTok. Free and genuinely powerful
- TikTok's native editor: Fast and simple for quick cuts, text, and trending sounds. Use this when posting from a project while still on site
- InShot: Clean interface with great text tools. Good alternative for voiceover-heavy tutorial content
Pattern Interrupts for DIY Videos
Change something every 3-5 seconds to keep viewers engaged—a new camera angle, a text overlay popping in, a speed change, a sound effect, a zoom. DIY projects can have long stretches of similar-looking work (sanding, painting, screwing), and pattern interrupts prevent viewers from scrolling away during these sections.
6. Common Filming Mistakes DIY Creators Make
Fix these five mistakes and your DIY videos will immediately look more professional than most of what's on HomeTok right now.
Filming horizontally
TikTok is vertical-only. Horizontal footage gets letterboxed with black bars and performs dramatically worse. Always film in 9:16 portrait orientation
Forgetting the “before” shot
Once you start demo or paint, the starting state is gone forever. Film thorough before-shots from multiple angles every single time—even if you're not sure the project is video-worthy yet
Bad audio from loud environments
Viewers tolerate imperfect video but swipe past bad audio instantly. Use voiceover, a lav mic, or trending audio—never record raw shop noise and hope for the best
A cluttered background
Viewers judge your work by the space around it. A dirty, chaotic workshop makes every project look worse than it is. Spend five minutes tidying the frame before you film
Too many angles, too few cuts
New creators often film one long continuous shot of the entire project. Viewers get bored. Capture short, varied clips from different angles and cut aggressively in editing
7. Getting Your Videos in Front of the Right Audience
Well-filmed DIY content is half the equation. The other half is making sure the right people see it. The TikTok algorithm rewards videos that hold attention, but getting those initial views—especially from 0 to 10K followers—requires a deliberate strategy.
Optimize Every Video for Discovery
- Use 3-5 targeted hashtags per video: mix broad (#HomeTok, #DIYTok) with niche-specific ones (#KitchenRenovation, #FurnitureFlip, #GarageMakeover)
- Write captions that ask a question or invite comments. Viewer comments are one of the strongest distribution signals
- Post when your audience is active. DIY content over-performs Thursday evening through Sunday midday, when people are planning and doing weekend projects
- Explore more DIY content ideas that consistently perform to diversify your formats
Build Series That Keep Viewers Coming Back
Recurring content gives people a reason to follow you. Try “Thrift Flip Thursday,” “$50 Weekend Project,” or a multi-part whole-room renovation where each video covers one step. Series content drives both followers and completion rate because viewers come back to see what happens next.
Accelerate Growth with Strategic Promotion
The hardest phase of growing a DIY account is the first few thousand followers. The algorithm doesn't have enough data to know who your content is for yet, so even polished videos can get buried. This is where strategic promotion makes the biggest difference.
Viryze helps DIY and home improvement creators get their best videos in front of people who are already interested in home renovation, furniture flipping, and hands-on projects. Instead of hoping the algorithm finds your audience, you can target specific viewers and push through the early-growth phase where most creators quit.
Once your filming is dialed in, combining well-made videos with targeted promotion creates a growth flywheel: more views drive more followers, which unlocks better algorithm distribution, which leads to brand deals with tool and home improvement companies. Read our complete guide to growing a HomeTok channel for the full strategy.
Ready to Grow Your DIY TikTok?
You've got the filming techniques. Now get your best projects in front of the right audience. Viryze helps HomeTok creators reach people who actually love DIY, renovation, and home projects.
Start Growing TodayFrequently Asked Questions
What equipment do I need to film DIY projects for TikTok?
Start with just your smartphone. As you grow, add a flexible tripod like a Gorillapod ($25-40), a clamp mount ($15) for attaching your phone to ladders or sawhorses, and a clip-on lavalier microphone ($20-30). A clear case or ziplock bag protects your phone from sawdust and paint. The biggest upgrade for DIY is a portable LED panel to brighten dim garages and basements.
How long should DIY TikTok videos be?
Before-and-after reveals perform best at 7-15 seconds. Quick tips at 15-30 seconds. Step-by-step tutorials at 45-90 seconds. Full project walkthroughs can go up to 2-3 minutes if the first 3 seconds hook viewers. Completion rate matters more than length—a tight 30-second video beats a padded 90-second one.
How do I film myself using power tools safely?
Never hold your phone while operating a power tool. Mount it on a tripod, clamp it to a sawhorse, or set it on a shelf. Wear safety glasses and hearing protection on camera—it models good behavior and keeps comments positive. Film cuts and finish shots in separate takes so you can focus fully on each one.
Do I need to show my face in DIY TikToks?
No. Many of the biggest HomeTok accounts are faceless—just hands, tools, and transformations with voiceovers. A hybrid approach works well: hands-only for the work and face-to-camera for the opening hook and final reveal. Faceless DIY content performs especially well because the project itself is the star.
What camera angles work best for DIY content?
The three workhorse angles are overhead top-down (hands on a flat surface), side profile (workbench shot), and first-person POV. Add a wide establishing shot at the start and tight macro detail shots during the reveal. Rotating between these five angles creates the visual variety that keeps viewers watching.
Can TikTok promotion help my DIY videos reach more people?
Yes. Promoting your best DIY videos through a service like Viryze helps them reach audiences already interested in home improvement and DIY projects. This is especially effective during the early growth phase when the algorithm is still learning who your content is for.
Related Articles

Head of Creator Success at Viryze
TikTok growth strategist helping creators reach their first 100K followers through data-driven promotion strategies.